As you recall, I had made my sauna floor waterproof by
putting down a shower pan liner—a thick waterproof membrane on the sauna floor
along with a drain. I planned to leave it exposed and just put duckboard over
it. However, the city inspector would not allow it and told me that I need a
non-combustible floor. Although it was more work, the inspector was right.
First, every time we fired up the sauna—you could see the
membrane on the floor become more malleable and less rigid.
Second, no matter how carefully we used the sauna—I noticed
ash marks on the membrane that could have burned through.
All three concerns (inspector included) would be solved by
cementing over the entire floor of the hot room. There could also be a
potential benefit (haven’t tested yet,) that the cement floor would radiate the
heat better than a PVC liner. Now, one concern is the added weight. For my hot
room of about 6’x12’, I ended up using 6 bags of the Sand Topping Mix cement from
Quickrete.
 |
| Sand Topping Mix cement used for sauna hot room floor. |
Each bag is 60lbs alone. Plus, you add water to activate it.
So, from my quick calculations, 6 x 60lbs = 360lbs + water = (Roughly) 400lbs
extra weight to the sauna. That’s like 2 guys. However, I think I should be OK
because:
One: the cement is spread out over the entire floor—not concentrated
in one area
Two: when building the sauna, I oversized things (smart, eh?) 6” x 6” instead of 4” x 4” posts, double 10” beams instead of 8” and so on.
Anyway, then came the hard part of actually doing the work.
To begin, we got everything we could out of the hot room—the less obstacles the
better. We cleaned the existing floor as
well as we could for the best outcome for the cement. I made sure that all the
holes or openings were well sealed on the floor membrane. This was the last
chance to truly make the sauna floor waterproof. I glued down the liner around
the drain hole to make sure it was sealed. I also glued the actual drain to the
liner as well. Things get dirty when working with cement, so I made sure and
put down a tarp over the changing room floor so nothing got ruined. Finally, I
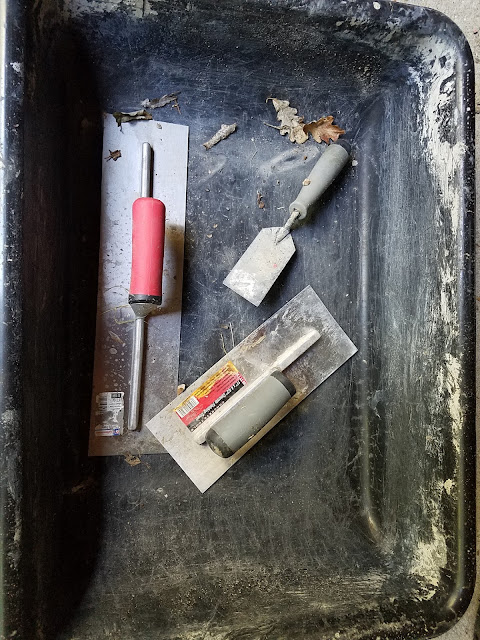
gathered my tools so I was ready for work. I used 5 tools:
A mixing tub (about $6)
A shovel
A 16” x 4” Cement Trowel (about $14)
A 6” x 4” Cement Trowel (about $8)
A 2” x 5” Cement Trowel (about $4)
The work started by putting one cement bag, wrapper and all,
in the tub. I then used the shovel to
cut the bag open in the middle, then flip it over to empty it out in to the
tub. I then poured water in to a bucket and added it to the cement in the tub
in batches, mixed, and added more water as needed. The proportions of how much
water to add are on the bag. Those are the best guidelines for you. However, I
am too busy to read instructions ;) besides, I’ve used cement before. I just
mixed it to a state slightly more watery than wet sand at the beach. If you get
it too watery, add cement. If you overdid the cement, add more water. We used the
shovel to mix the cement with water. There was no water left in the tub, the
cement was pretty malleable and easy to spread yet it didn’t run down like
water. Anyway—read the manual :)
 |
| Mixing cement with a shovel in a cement tub. |
Now, cement is not like glue—so you have some time to work
with it, but you still need to be aware that as it dries, it’s harder to work
with (you got about 30-40 minutes). So, I started putting it down in the hard
to reach areas, such as behind the sauna stove.
 |
| First batch of cement around and behind the sauna stove. |
With the Sand Topping Mix cement, there’s no aggregate (pebbles)
just sand and mortar. Technically, it can be spread as thin as ¼” and still do
its job. I was aiming for about a ½” thickness throughout the floor. Now remember,
we have already previously given the floor a slope towards the drain from all
angles of the sauna hot room. Our goal with putting down the cement is to
preserve that slope. This can easily be checked with a long level after you
have finished putting down a section of the cement on the floor. The cement mix
is pretty thick and should hold the level tool just fine.
When forming the cement on the floor, use the longer trowel
as much as you can to give the cement a nice uniform smooth look. If the big
trowel doesn’t fit, switch to the smaller one. Only use the smallest trowel for
detailed work and not to smooth over an area. Remember, you can always add or
remove cement from an area and smooth it over again. Do that until you’ve
achieved the look you want. Finally, once you confirmed that the slope still
exists, and the cement is smooth and looking good, you can move on to the next
hard to reach area.
 |
| Next hard to reach area of the sauna hot room floor. |
 |
| Farthest section of the sauna hot room floor is done with cement. |
 |
| Final section of the sauna hot room floor being cemented. |
 |
| Last piece of the sauna hot room floor being cemented. |
Once you have all the hard to reach areas completed, go
ahead and finish off the last part. Remember to feather the cement down towards
the drain right around the drain—use the small trowel. Once done, clean up and let
the cement cure. Spray the tools, the tub, and the area where you mixed the
cement with water to keep everything clean for next time. Next day, you can
walk on your new cement hot room floor to admire your work, but give it about a
week to let it fully cure before really using it.
 |
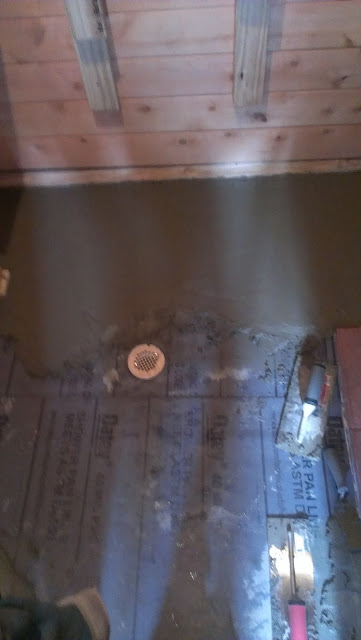
| Cemented sauna hot room floor 24 hours later. |
 |
| First sauna firing after the cement floor was completed. |
Well, I am more than pleased with how the floor turned out and what it does for the hot room. I think others agree with me as well. Not only does it look good, it's functional. We can now stack wood near the stove while we take a sauna and not worry about it ripping the waterproof liner. The cement was cool to walk on barefoot even though we had the sauna up to about 190F. The light color of the cement actually seems to make the room brighter. Overall, I am very happy with the results. We will soon see if the inspector agrees with me ;)


Wow, owning a sauna is like owning a car (or house for that matter)...there is always some project to do, especially if you have a thorough or busy body inspector.
ReplyDeleteSo how is this working 6 years later? I'm getting the same stove and I'm wondering how hot the floor gets in front of the stove?
ReplyDeleteThe floor is mostly intact. Just a few cracks here and there in the cement. I haven't found the floor to get hot. It could be because the heat just doesn't go that way. I can also be that I have a floor drain that causes air to circulate and cool off the floor. One thing I can tell you, before I put cement down, I only had the rubber membrane. We had many saunas and the membrane never got warped. So, there is not much heat that goes towards the floor. Possibly another reason is that the sauna is sitting on stilts due to the slope of the land below it-- maybe that helps keep the floor cool as well.
DeleteAs far as the stove, it's awesome! Still as good looking as the first day. It's built like a tank and I constantly get comments on how great it is. Accidently got our 8x12 hot room to 245F a few weeks ago.