The goal of this weekend was to get the roof covered and to
put the soffits in. I went out on Friday and bought materials-- $$$. There were
a few things we needed. Luckily, the 28 sheets of OSB we bought will be used on
the roof as well. I had the option of doing wooden soffits like my main house
has, or aluminum. With wooden, there is the deal of maintenance and painting.
With aluminum, there’s no upkeep and they’re already painted and pretty cheap.
That’s the route I decided to take. So, I needed to buy a few things.
- Drip edge—this gets installed around the roof ends all the
way around to guide water away.
- Vented soffits.
- J-channel and F-channel to hold the soffits in place
- Fascia
- 2x6 lumber for fascia all around the roof (not just the
sides, but also the V parts.
- White nails to nail the aluminum material
- Roof clips that hold the plywood sheets together on their
long sides
- 2x4 for framing the soffits and overhang ladders
- Something called Ice and Water—a membrane that gets put on
the bottom parts of the roof to help seal out water and ice dams
- Felt paper for the rest of the roof—again to seal out
water.
See this video for drip edge installation and Ice and Water membrane installation. NOTE: the Ice and Water membrane needs to cover at least 1 foot of heated space. So if your eves are 2 feet, you need at least 3 feet of Ice and Water from the eves up the roof.
http://www.finehomebuilding.com/how-to/video/replacing-roof-series-apply-drip-edge.aspx
The next day, work began. I got another buddy who’s in
construction who stopped by to help. At first, a chalk line was run through the
truss overhangs to make sure they were all level. They weren’t. So, they were
trimmed along the line to make them line up in one straight line. Next, the
front and back overhang lengths were calculated and added to the 14 foot wall.
That’s how long the fascia 2x6 board was cut. It was then nailed to the truss
ends. After that, work on covering the roof began. Starting from one corner and
leaving extra OSB to later be cut on the front of the building and to accommodate
the overhangs, a sheet was placed flush with the fascia on its 8’ side and stapled
to the trusses with Crown Staples. Another sheet went to the left of the first
sheet. Once the first row was filled, the roofing clips where put on the 8’
side and the next row of plywood was installed in a staggered way-- like we did the floor. Once one side of the roof was
covered, we moved on to the next side. When the roof was done-- the work on the overhang began.
I read somewhere that doing an overhang with 2x4 ladders can
only overhang 12 inches. Anything longer has to follow the rule of 1:2. For
each foot of overhand, there should be 2 feet of a 2x4 attached on the roof
side. To do that, you either use special
end trusses (which I didn’t get :) ) or notch the trusses and run the 2x4s through the notches. I decided to go
safe and stayed with only a 12” overhang. The ladders were built out of 2x4s
and attached to the front of the building. The overhanging OSB was later
stapled to the overhangs, and excess OSB was cut off with a circular saw.
 |
| First sheet of roofing sheeting goes on after the 2x6 fascia was nailed to truss ends. |
Once
the roof was fully covered in sheathing, we could then remove the wall bracing
we put in when putting up the walls. Now we had room to walk around the inside
and do more planning on the layout.
Unfortunately, we ate up some hours in the beginning with
tool malfunctions so we started a bit late. So, we didn’t get a chance cover
the roof in felt or finish the soffits, but we still have a few warm weekends
left and the sauna is progressing really well.
 |
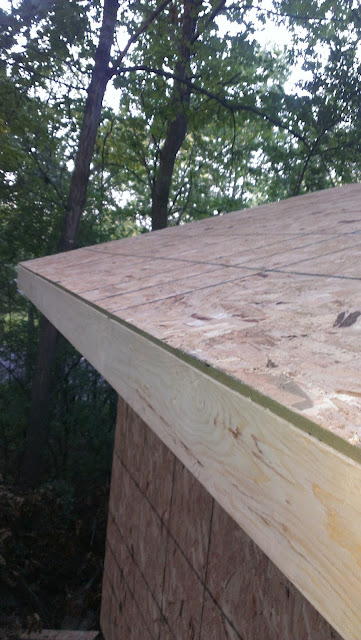
| Closer look at how the 2x6 fascia is nailed to truss ends. |
 |
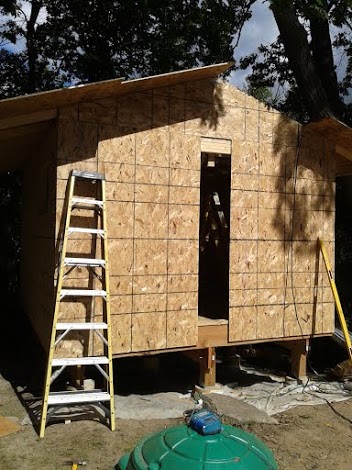
| Roof and wall sheathing in place. |
 |
| One side of the roof is done. |
 |
| Sheathing the rest of the entry wall and the other side of the roof. |
 |
| Again, fascia board is nailed on the trusses before sheathing starts. |
 |
| Overhang ladders framed. |
 |
| Overhangs framed and done with fascia nailed on them. |
 |
| Another look at how the overhangs are framed. |
 |
| More views of the overhangs. |
 |
| Return box framing. |
 |
| Roof sheathing flush with fascia. |
 |
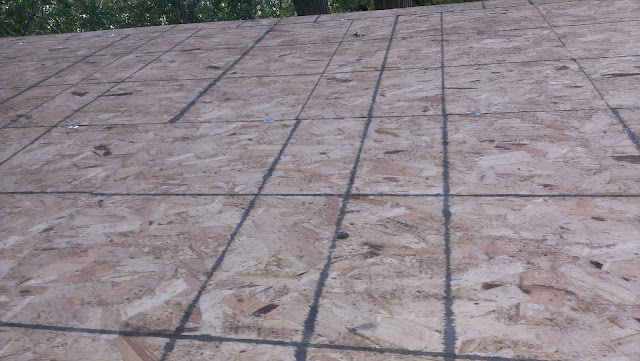
| Roofing clips used to connect sheathing sheets together. |
 |
| OSB Roof sheathing spacers view. |
 |
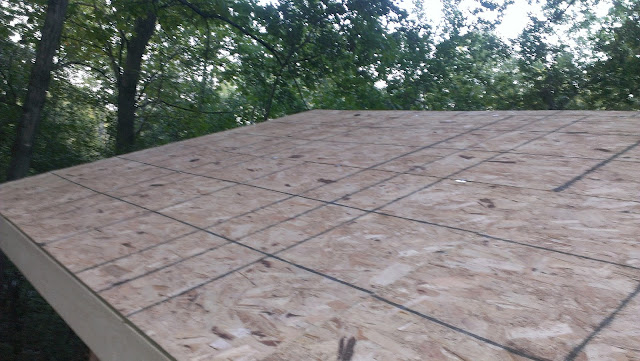
| Finished view of one side of the roof sheathing. |

been wanting to build a sauna for awhile. great blog, with lots of photos/details. nice to see it take shape one step at a time
ReplyDeleteThank you! It's definitely one of those projects that seems impossible, but you learn a lot and take it one step at a time. Make sure you have friends/family to help ;) And lots of pizza and beer :)
ReplyDelete