Oct 26, 2016

Wood stove steamer or kettle humidifier for sauna

If you follow this blog, you know that the sauna was built with the help of a lot of my friends who frequently use it as well. So, it’s not surprising that any addition or alteration to the sauna gets debated by the whole group. One such long standing debate has been about the “Kettle Humidifier” or “Stove Humidifier.” There are different variations of this, but, the idea is the same. A cast iron pot/kettle is filled with water and placed on top of the stove/rocks. As the stove produces heat, it heats up the pot/kettle in which water evaporates and humidifies the air.

After seeing this kettle at a store, I thought it would be a great addition. However, the debate raged on. Some people thought that it would make the sauna a steam room and that’s not what we wanted. Because of that point, I stayed away from investing in this humidifier kettle-- until recently. This fall, I decided to bite the bullet and give it a try. It’s only $15 :)

Wood stove top humidifier for sauna.

I have to say, I’m glad I bought it. It definitely does NOT make a steam room out of the sauna. However, what it does is makes it easier to breath and makes, at least me, sweat a lot quicker. An extra bonus is you can add your scents directly to the kettle water for a continuous release of wonderful Eucalyptus or Spearmint or whatever sauna scent you like. Keep in mind, this is not a replacement for throwing water on the rocks—this is in addition to. Any time you want some Löyly, you can still throw a few ladles of water over the rocks-- the kettle does not get in the way.


So, if you have never heard about a humidifying stove kettle or have been playing with the idea of getting one, I suggest you go and buy one. I know it made my sauna experience more enjoyable and I hope it does the same thing for you.  

Sep 15, 2016

Final sauna inspection by the city inspector

About a year ago plus a couple of months, I made the decision to build an outdoor wood fired sauna. I wanted to do it honestly and following the city rules so that I didn’t have any issues down the road. I started my build by talking to my city inspections department and figuring out exactly which permit is needed. In my city, any outdoor structure under 200 sq feet does not require a permit, however, it still needs to be approved by the city as far as where it’s placed, how it looks and such. I learned that my city inspections department had a pretty foggy idea of what a sauna is. One concern they had is there would be too much smoke outside. Apparently, as I found out, they thought a sauna was a wood boiler—the tiny house size oven you see placed outdoors behind a house in rural areas that heats the house in the winter and creates lots and lots of smoke. Eventually, the inspections department told me I needed to pull a stove permit and that the stove needed to be UL approved up to the UL 875. I paid my $90 and got the permit. As you recall from reading the blog, there are only 2 or 3 stove in the country that are even UL listed. From my further research, I found out that the listing my city inspections requested that I get actually applied to “Electric Sauna Stove” once I looked up the particular UL number. (http://ulstandards.ul.com/standard/?id=875) The correct UL listing for a wood burning stove is actually UL 1482 (http://ulstandards.ul.com/standard/?id=1482&edition=7&doctype=ulstd)

Well, I did find and install a great UL listed stove- Kuuma wood sauna stove by Lamppa Mfg (http://www.lamppakuuma.com). I followed the stove clearances and worked closely with my city inspector. When the chimney was first installed, I had my initial inspection and passed. After the stove was installed, I had my final inspection and FAILED. The inspector had some changes for me to make, such as getting half of one of my benches out of the clearance range of the stove, and covering the floor with cement. I complied.

Yesterday, I had my follow up “final” inspection. I am pleased to announce that the inspection PASSED and my sauna is now in full compliance and is ready for official use! 

Sep 9, 2016

Cement over the sauna hot room floor

As you recall, I had made my sauna floor waterproof by putting down a shower pan liner—a thick waterproof membrane on the sauna floor along with a drain. I planned to leave it exposed and just put duckboard over it. However, the city inspector would not allow it and told me that I need a non-combustible floor. Although it was more work, the inspector was right.

First, every time we fired up the sauna—you could see the membrane on the floor become more malleable and less rigid.
Second, no matter how carefully we used the sauna—I noticed ash marks on the membrane that could have burned through.

All three concerns (inspector included) would be solved by cementing over the entire floor of the hot room. There could also be a potential benefit (haven’t tested yet,) that the cement floor would radiate the heat better than a PVC liner. Now, one concern is the added weight. For my hot room of about 6’x12’, I ended up using 6 bags of the Sand Topping Mix cement from Quickrete.

Sand Topping Mix cement used for sauna hot room floor.

Each bag is 60lbs alone. Plus, you add water to activate it. So, from my quick calculations, 6 x 60lbs = 360lbs + water = (Roughly) 400lbs extra weight to the sauna. That’s like 2 guys. However, I think I should be OK because:

One: the cement is spread out over the entire floor—not concentrated in one area

Two: when building the sauna, I oversized things (smart, eh?) 6” x 6” instead of 4” x 4” posts, double 10” beams instead of 8” and so on.

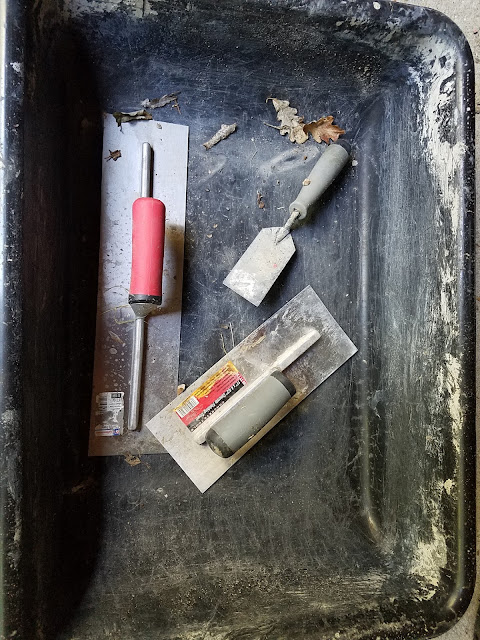
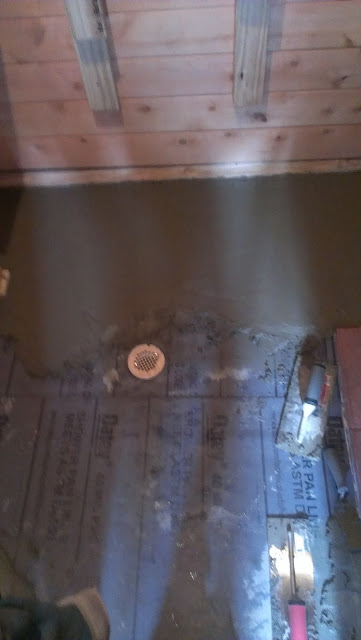
Anyway, then came the hard part of actually doing the work. To begin, we got everything we could out of the hot room—the less obstacles the better.  We cleaned the existing floor as well as we could for the best outcome for the cement. I made sure that all the holes or openings were well sealed on the floor membrane. This was the last chance to truly make the sauna floor waterproof. I glued down the liner around the drain hole to make sure it was sealed. I also glued the actual drain to the liner as well. Things get dirty when working with cement, so I made sure and put down a tarp over the changing room floor so nothing got ruined. Finally, I gathered my tools so I was ready for work. I used 5 tools:

A mixing tub (about $6)
A shovel
A 16” x 4” Cement Trowel (about $14)
A 6” x 4” Cement Trowel (about $8)
A 2” x 5” Cement Trowel (about $4)

Tools used to form and shape the sauna hot room floor.

The work started by putting one cement bag, wrapper and all, in the tub. I then used the shovel to cut the bag open in the middle, then flip it over to empty it out in to the tub. I then poured water in to a bucket and added it to the cement in the tub in batches, mixed, and added more water as needed. The proportions of how much water to add are on the bag. Those are the best guidelines for you. However, I am too busy to read instructions ;) besides, I’ve used cement before. I just mixed it to a state slightly more watery than wet sand at the beach. If you get it too watery, add cement. If you overdid the cement, add more water. We used the shovel to mix the cement with water. There was no water left in the tub, the cement was pretty malleable and easy to spread yet it didn’t run down like water. Anyway—read the manual :)

Mixing cement with a shovel in a cement tub.

Now, cement is not like glue—so you have some time to work with it, but you still need to be aware that as it dries, it’s harder to work with (you got about 30-40 minutes). So, I started putting it down in the hard to reach areas, such as behind the sauna stove.

First batch of cement around and behind the sauna stove.

With the Sand Topping Mix cement, there’s no aggregate (pebbles) just sand and mortar. Technically, it can be spread as thin as ¼” and still do its job. I was aiming for about a ½” thickness throughout the floor. Now remember, we have already previously given the floor a slope towards the drain from all angles of the sauna hot room. Our goal with putting down the cement is to preserve that slope. This can easily be checked with a long level after you have finished putting down a section of the cement on the floor. The cement mix is pretty thick and should hold the level tool just fine.

When forming the cement on the floor, use the longer trowel as much as you can to give the cement a nice uniform smooth look. If the big trowel doesn’t fit, switch to the smaller one. Only use the smallest trowel for detailed work and not to smooth over an area. Remember, you can always add or remove cement from an area and smooth it over again. Do that until you’ve achieved the look you want. Finally, once you confirmed that the slope still exists, and the cement is smooth and looking good, you can move on to the next hard to reach area.

Next hard to reach area of the sauna hot room floor.

Farthest section of the sauna hot room floor is done with cement.

Final section of the sauna hot room floor being cemented.

Last piece of the sauna hot room floor being cemented.

Once you have all the hard to reach areas completed, go ahead and finish off the last part. Remember to feather the cement down towards the drain right around the drain—use the small trowel. Once done, clean up and let the cement cure. Spray the tools, the tub, and the area where you mixed the cement with water to keep everything clean for next time. Next day, you can walk on your new cement hot room floor to admire your work, but give it about a week to let it fully cure before really using it.
 
Cemented sauna hot room floor 24 hours later.


First sauna firing after the cement floor was completed.

Well, I am more than pleased with how the floor turned out and what it does for the hot room. I think others agree with me as well. Not only does it look good, it's functional. We can now stack wood near the stove while we take a sauna and not worry about it ripping the waterproof liner. The cement was cool to walk on barefoot even though we had the sauna up to about 190F. The light color of the cement actually seems to make the room brighter. Overall, I am very happy with the results. We will soon see if the inspector agrees with me ;)

Jun 21, 2016

Premium specialized sauna accessories-- not required.

Once the sauna was getting close to completion, usable, but not finished, a big step for me was to start buying the accessories for it. A necessary accessory is a wooden bucket and a ladle. My go to place for both was the web. However, I was a little surprised that I had to pay $60+ for anything close to decent (a plastic water liner in a 200+F sauna? Really?). Also, it was no secret that the same buckets/ladles being sold on different websites were also sold on AliExpress at about $20 cheaper per bucket or even cheaper when bought in bulk. After exhausting all my options, I bit the bullet and bought the best deal I could find, on Amazon, which fit my needs. Grand total for the sauna bucket and ladle, about $69.

Bucket I purchased online, specifically for sauna use $45.

Ladle I purchased online specifically for Sauna use $21.55.


When everything arrived, we were excited to try them out. Both the sauna bucket and ladle looked authentic and were a great fit to all the cedar used in the sauna. Things were good, however, after the first few sessions, we noticed that the ladle sprung a leak. The ladle, advertised as being specifically for a sauna, was carved out of wood. It seemed like the cup portion of it, was carved out of a piece containing a knot. After a few more rounds of sauna, with shrinking and expending, the wood gave and the ladle split. A few sessions later, the ladle broke completely. This was a special ladle, specifically for saunas, and thus, at a premium price of $21.55.

A wooden sauna ladle cracked from use.

For a few sessions after, we ended up using Styrofoam cups and whatever else we could find to dump water on the sauna stove. One day, I was at Walmart, in the cooking accessories isle. There was a stainless steel ladle for sale, with a wooden handle—for cooking. Ladles of such material, specifically for saunas, are $40 online!! This thing, under $6.

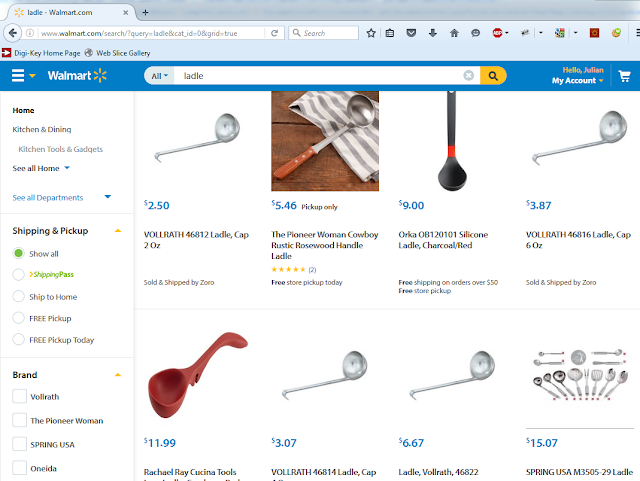
This brings me to my main point. An item doesn’t need to be specifically made for a certain use to be charged a premium on. Below is a screenshot of ladles on Walmart.com

A regular ladle is cheap!

Now, here is the same search with the word Sauna added. Do you see my point?

A ladle with the word "Sauna", is sold at a premium.

Furthermore, as one of my friends pointed out, if you go to say HomeDepot.com and do a search for Galvanized Pail, you’ll get the following, CHEAP, results. These things will outlive your sauna by many years.

Alternative cheap sauna buckets sold at Home Depot.

So, the moral of this post is, try and find non-specialized items to be used in a sauna, in a specialized way. It may save you some money as well as frustration of buying inferior specialized products sold at a premium.

Jun 13, 2016

Outdoor Sauna-- You can now use it in the summer!

When you think of a sauna, you probably think of massive amounts of snow and bone chilling cold. But what about 90F degree weather and blooming flowers? Can a sauna be used in the summer and actually enjoyed? Sure, with an addition of a simple outdoor shower.

You don’t need a snow bank to cool down after a sauna. The evenings here are around 70F degrees and the water coming out of the garden hose is pretty bone chilling. With a few cheap parts, we decided to build a portable outdoor shower which we use in the summer to cool down between sauna rounds. The shower is light and can be moved around the driveway to wherever we need it.

We used only green treated 2x4s and the first thing we built was the base. The base is in a form of an H and pieces are secured by outdoor screws. Then, measuring to our average heights, we cut a 2x4 to attach to the piece of the base that holds the 2 parallel pieces together. This holds the shower head and the water lines. This pieces was attached with 5 screws to the base.

The base of our outdoor DIY shower.
This is the base of our outdoor shower. Make sure the two side pieces are long enough to make the shower steady.

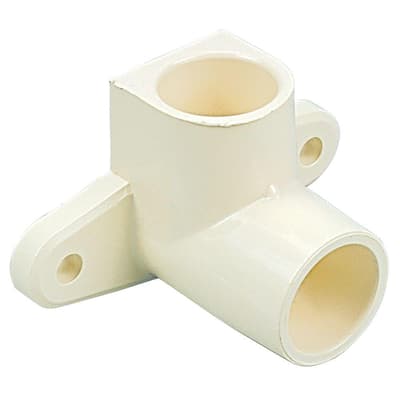
Now, the structure of our shower was complete. Next we attached the water parts. My choice was to build the shower out of CPVC ½” line. It’s easy to work with and is readily available. Make sure you use the CPVC glue for it as well. We started with mounting something called the “drop ear elbow.” Yea, I know, took some Googling on my part to find out the name:

Drop ear elbow image for where the shower head pipe screws in.
Drop Ear Elbow. This is where the shower head pipe threads in shown upside down in this photo.
http://www.homedepot.com/catalog/productImages/400/88/88eb57f5-05e0-44dc-8bfb-29e580ecaaad_400.jpg

We mounted it to where our shower head would be, at the top. We screwed it in to the 2x4 with outdoor screws with the input of it facing towards the bottom and the threaded part facing out. Make sure you get the CPVC piece since you’re working with CPVC piping. Once that was attached, we attached the mixing valve to the shower shaft where it was most convenient to operate it. The mixing valve we used is a simple one piece plastic (CPVC) type for around $5.

A $5 simple plastic mixing valve is all we needed for our outdoor shower.

You’re now starting to have the general shower layout. Next, we built the water hose input. We wanted to hide it at the bottom of the shower on the opposite side. We bought a “brass to CPVC” fitting and a coupler that threaded in to that fitting on one side and accepted a garden hose fitting on the other side. Next, we drilled a hole all the way through the bottom of the shower shaft that was big enough to hide that brass fitting in.

Garden hose screws in on the back of the outdoor shower for a cleaner look.

Once that was done and all fit in, we could start on attaching the lines. Using the ½” CPVC pipe, we cut lengths to size to connect all the components. To get the line through the hole at the bottom, we used a CPVC 90* elbow and a coupling to connect the “brass to CPVC” to the elbow. Remember to insert the pipe all the way in to the fittings and use the orange solder both inside the fittings and around the pipe that’s going in to the fittings. Once attached, you should see the orange solder outside of the joints.

Now that all the main components were connected, we used pipe straps to secure the CPVC pipes to the shower shaft to make things more rigid. Next, we need the stainless shower head pipe. We threaded it in to the “drop ear elbow” using Teflon tape. Afterwards, we attached our cheap $5 shower head to this pipe. Remember, this is an outdoor shower that will stand up to the elements—don’t spend too much on it—unless you want to :)

And with that—the shower was complete. When you build yours, fire up the sauna and give the shower about 20 minutes to cure before you can start running water through it. While the sauna warms up, put some meat on the grill and socialize. By the time you’re done, the sauna will be up to temp, and the shower cured. Go ahead and do a round in the hot room then get under the cold shower water. You will agree, your sauna is not just for winter anymore.

Fully assembled outdoor shower for after sauna use. Side view.
Fully assembled custom built outdoor shower for after sauna use. Side view.

Fully assembled outdoor shower for after sauna use. Front view.
Fully assembled custom built outdoor shower for after sauna use. Front view.

Jun 8, 2016

Sauna stove installation instructions misinterpreted.

When building an outdoor sauna, you may have the best intentions in mind. You want to do it correctly and legally. You pull a permit, purchase a UL listed stove to be compliant with the city regulations and install it by carefully following the install manual. Then, you request your final inspection and fail it. Why? Because the way you interpreted the installation manual was different than what it was trying to convey. The result? Benches need to be cut short. Flooring needs to be cemented. What is the moral here? Even though you think you understand the install instructions, contact the stove manufacturer prior to installing the stove and building around it to save yourself from redoing your work.


What happened:

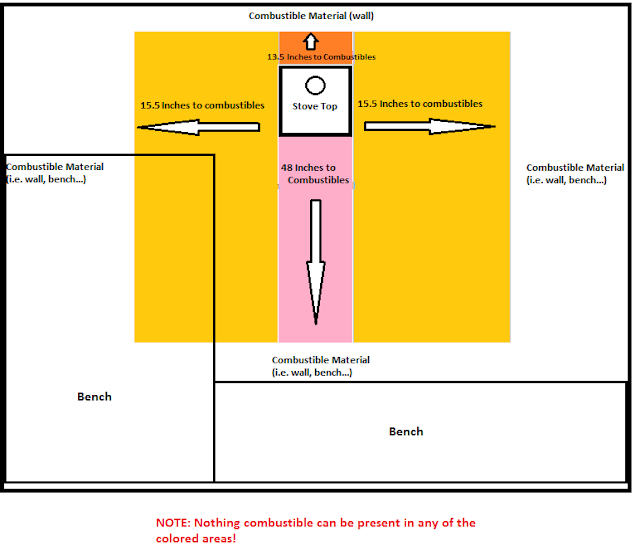
Per manufacturer specs, the stove has clearances that need to be followed for safe operation. There’s side clearances of X inches to combustibles. X is the same on both sides. There’s the rear clearance Y and front clearance Z. Both front and rear clearances are different (Y does not equal Z). Where this gets interesting, and not explicitly listed in the install manual, is here. The side clearance X actually extends the whole length of the front clearance Z, on both sides. Furthermore, the “clearance to combustibles” refers not only to the wooden benches at 90 degrees to the plane of the stove, but also refers to the floor (and probably, by the same definition, to the ceiling.) Furthermore, though all the installation pictures showed the front clearance with the arrow pointing to the door of the stove, they actually meant the whole front side. Finally, although my floor was built up from non-combustible cement board and covered with PVC membrane to be waterproof, that thin piece of PVC is considered combustible—and thus non-compliant.

Shaded areas show where the combustibles clearances extend.
Shaded areas show where the combustibles clearances extend. Nothing combustible can be placed in to those areas.

Below is how I built my hot room. Because the bench is within the shaded area and the top of the floor has the PVC membrane, I am non-compliant and failed my final inspection. Now I need to cover the membrane with cement and cut half off my long sauna bench to pass the inspection.

This shows where I went wrong in my build. Part of my long bench encroaches into the no combustibles zone.
This shows where I went wrong in my build. Part of my long bench encroaches into the no combustibles zone. 

Once again, to sum up. When planning out your sauna hot room and chimney/stove installation, be sure to contact the sauna stove manufacturer and verify your understanding of the install documents is exactly what they tried to convey. Also check this with the inspector. In my case, I double checked all the installation steps with my friends and made sure we all understood them the same way. However, I should have also double checked with the stove manufacturer as well.

Finally, be aware that photos used on the stove manufacturer's website showing the sauna stove sitting right next to benches and other combustibles is only for marketing purposes and doesn’t have to be technically to the installation spec. This does not fly with the inspector either.

Sauna stove too close to wooden benches.


Sauna stove too right next to wooden benches.


Sauna stove too right next to wooden duck board.


May 11, 2016

Hot tea, cold mandarins, hot sauna.

Once all the main components of the sauna were in place, I started working on the creature comforts. Sure, there's still trim to be done, the front porch to be built and more benches to be completed, but that can wait. As my friend's dad says, "there's nothing more permanent than temporary."

Since my sauna is a bit more modern with electricity and all, I thought it would be a great addition to get an electric tea kettle for making hot tea. We later found out that it was, in fact, a great addition to our sauna. After doing a few rounds in the hot room and cooling off, a hot cup of sweet tea makes you really feel good and helps to relax. An addition of one shot of Fireball Cinnamon Whiskey mixed in to the hot tea helps to relax even more as well as takes care of the sweetness aspect.

One more food related item that works great in combination with a sauna are mandarins. In the winter, if you get your hands on a sack of mandarins, put the whole sack outside, in the snow, and let them chill. Then, between sauna rounds, have a mandarin. Not only does it taste great cold after a sauna, it also quenches your thirst.

Next time you're in a sauna-- give the above two suggestions a try, then let me know how they worked. Also, what do you do that's special in your sauna?

Apr 13, 2016

A thought about throwing tap water on hot stones.

Throwing water on the hot rocks to generate some steam in the hot room is great. You mix a little bit of spearmint or something in to the water, throw a ladle full of water on to the rocks and hear it sizzle like a skillet. You get back on the bench and wait for that hot steam wave to heat you in the face and hang around for about a minute. However, when you use water from the tap, the chlorine, and whatever else the city puts in the water comes along for the ride. When that wave of humidity comes around-- you know something isn't right. You can smell the odd odor coming from the evaporated water.

To solve that-- I tried using filtered water from the store. For a couple of dollars, you get great steam that smells like the scent of spearmint that you added to it, rather than something else. It's also easier on the lungs.

Mar 23, 2016

Building sauna benches-- Afterthought

When I was choosing my material for the bench tops, I found Poplar, Aspen and Cedar to all be acceptable in a sauna hot room. I ended up buying Aspen simply because it seemed cheaper and was in stock at the store as opposed to Cedar and Poplar. The boards were grade "A" without knots and polished smooth which seemed perfect at the time.

Afterthought:

The smooth wood is like glass and seems to really heat up. In comparison, when putting up the cedar on the walls, we had a choice of using the smooth side of the boards or the rough side and I chose the rough side. In my mind, the rough side acts like fins on an engine and cools the wood. This polished Aspen I now have on the bench tops is smooth with no fins and gets pretty darn hot. I may try roughening it up, but you think about this afterthought when you select your bench-top wood.

Mar 22, 2016

Building custom sauna benches and bench supports from scratch.

Up next we needed to build the sauna benches for the hot room. The bench layout in the room was constrained by the restrictions on clearances to combustibles imposed by the stove. The layout we had decided on was L-shape benches having a short bench run parallel to the wall opposite the stove, and a long bench running on the perpendicular wall to the right of the stove. 

Next, we had to decide on the widths and heights of our benches. There are suggestions online, but, we decided it would be a subjective processes for us. For the height of our benches, we made our decision by estimating our average heights and decided on the bench being such that we could be sitting as high as possible without even the tallest guys hitting their head on the ceiling. I think the final height of top of the bench support ended up being 38 inches from the floor. Next, we needed to decide on the width of the bench. Same thing there—we measured an average from the back to the knees of the guys that’d use the sauna and came up with an 18” bench frame followed by about a 1” face piece. So now we had a rough idea of what we were doing.

Now, I needed to research which wood to use for the tops of our benches. I knew the bench frame would be done with Pressure Treated wood to save money. However, for the top bench finish, I had some choices. Obviously, cedar is a valid choice—but expensive and not sold everywhere. One note here, you need to use “clear”, “grade A”, “finishing” wood so there’s no splinters. Some popular woods are Poplar, Aspen, Birch. You can’t use pine or pine variants, they seep sap (seep sap, seep sap….). My decision came down to price, and the ease of purchase/availability. I chose Aspen. It’s a bright white wood without any significant smell. Not my first choice, but I decided I’ll redo it once I play and win the lottery.

With the Aspen bought ($200+), it was time to frame. We decided that the short bench would be the easiest since it didn’t require supports below it—only on the back and the 2 side walls. We had previously marked off the studs on the walls of the hot room, over cedar, where the benches would go. We now cut our Pressure Treated pieces to the lengths we wanted and installed them on the long wall and the short wall of where the benches will go. These will support the back of each bench. We secured them with 3 inch screws, two per stud, pre-drilling and screwing in to the studs at each marked location. We also cut a 2x4, the width of the bench and secured it to the opposite wall giving us the third of our three supports. Once we build the bench, it will simply rest on top of the three, 1.5 inch wide supports of the walls.

To build the bench we worked on a table outside of the building giving us plenty of space. We cut two Pressure Treated 2x4s the width of our hot room (minus .25 inch to be able to rotate the bench) for the long side of the bench, and 2 more that would be 18 inches, minus 1.5 + 1.5 to for the short side of the frame (the width of the bench). We secured all 4 sides in a rectangle shape by pre-drilling and using 3 inch screws. It’s OK to have the screw tops exposed, no need to sink them yet. They will be covered by Aspen, so no one will ever get burned on them.

Framing a sauna bench from pressure treated 2x4s
Framing a sauna bench from pressure treated 2x4s.

With a basic frame complete, we took it in to the hot room to test fit. We placed it over our supports at the walls. It fit and seemed to be good. REMEMBER— build the frame about a quarter inch shorter than the distance between the two opposite walls so that you can maneuver the bench without getting it stuck on the wall. You will need to be able to remove benches for cleaning and such.

Next, we took the bench frame back out and added more dividers/supports between the long sides of the bench frame to make the bench rigid. We did this about every foot and a half. Now came the tricky part. You can’t have any screws exposed or they’ll get hot and burn people. So the Aspen needs to be attached to the bench from underneath the bench frame. To do that, we split a few 2x4s in twos and attached them to our dividers flush with where the top would be in an L-corner fashion.

Sauna bench framing with blocking and L-corners to attach the top boards from underneath.

These 2x2s were attached with 2 screws on both opposite sides. We then measured and cut our Aspen and ran screws from underneath the bench frame, through the 2x2 strips we attached half way in to the Aspen making sure they didn’t come all the way through. As always, we pre-drilled the holes before putting in the screws. In order to keep the space between the Aspen boards consistent, we used scrap DuRock pieces to maintain a half inch gap. The last Aspen board was cut to the remaining width of the bench and nailed to the frame with brads at a slightly higher air pressure then needed to make sure they sunk in well. Remember, this board is at the back of the bench. With the final board in place, we had our first bench. We put it back on the supports in the hot room and tried sitting on it. It held all 3 of us big guys very well. The only piece that was left is to attach the Aspen piece to the façade of the bench.
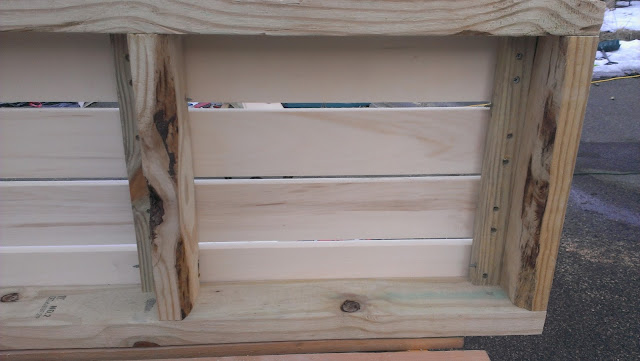
Bench top wood secured to the bench frame from underneath.


Side view of the assembled sauna bench.

The first bench we put together, we decided that a 18 inch width would work. After using it for a week, we decided we wanted to build the next bench a bit wider—perhaps 20 inches. Also, the next bench would be a little more tricky because it required building support underneath it since it didn’t have parallel walls to rest on. There were several hurdles with this support. One, the floor is concave for draining in the place where the bench would be. Two, the bench needed to be tied in to the wall studs to be sturdy, not just the cedar.

To begin, we decided to use a treated 2x4, the length of the bench, that we would attach to the floor. So we cut one and laid it down. Then, we measured up to the height of our bench, 38 inches, and cut two pieces that would go perpendicular to the floor piece. We only did this for the two opposite sides of the floor piece. This is because we wanted the part that flexes in the middle to be fully attached to the floor so we get the accurate measurements before we made any cuts. With the 2 pieces cut, we pre-drilled and screwed them from the bottom of the floor plate on to the floor plate. We then laid the floor plate equal distance from the wall and attached it to the floor, using two 4 inch screws in one foot separations.

Next, we cut another piece of treated 2x4 that would be the top plate for our support structure. We put a level going from our top plate to the 2x4 support which we previously attached to the wall. The benches would sit on top of both supports. The level showed we were still alright. We then pre-drilled holes and attached the top plate to the 2 pieces on both sides of the standalone support.

From here on, things were a bit easier. First, going off the locations of the screws that attached the wall bench support to the wall, we could tell where the studs were (along with our previous markings). We would need to attach blocking right underneath that support so that we could secure our standalone bench support to the studs. We simply used about 12 inch long pieces of treated 2x4, going the long way down and screwed one to each of the studs.

Now that we had blocking to securely tie the bench support to, we needed to finish building the studs of the standalone bench support structure. The only trick to that was that the edge of each stud needed to line up flush with the edge of each of the blocking we installed on the wall. Once we got each stud flush, we pre-drilled and screwed it to the top plate leaving the bottom hang. We went through and installed the rest of the studs the same way. We then used small blocking to secure the bottoms of these studs to the bottom plate. We simply level each stud, attached the blocking to the bottom plate and attached the stud to the blocking.

[PHOTO COMING SOON]

Finally, we went back, cut 2x4 pieces to reach from the wall blocking to the studs and secured them to the wall blocking only. Afterwards, we build another bench the same way as the first one, and put it on top of our supports. Now we could finally secure our standalone support to the pieces connected to the wall blocking by getting it to cleanly lineup underneath the bench. That is what tied the standalone bench support structure to the studs of the wall and make the whole thing solid. Solid as can be!

With that—we had all the benches we needed for a comfortable sauna. We still have the bottom benches to finish, but, the hot room now is more usable than ever, and I’m proud.

Standalone bench support secured to the blocking attached to wall studs.
Both top sauna benches complete.

Mar 18, 2016

Sauna rocks and scented oils-- off topic thoughts.

So I think I understand the general theory of the rocks on the sauna stove. The stove heats them up. They radiate heat. They also help in boiling water when you toss it on top of them. Getting the type of heat you want is an art that takes tweaking and testing. The sizes of the rocks also affect the heat. Big rocks take longer to heat up and longer to cool down. Smaller rocks are the opposite.

You can also purchase sauna rocks online (and I’m guessing in stores too). I saw prices of about $60 for 50 lbs of rock. Yes ladies and gentlemen, we’re talking about paying $60 for rock. That’s about 5 cases of beer. About 60 beer bottles. About… oh you get the idea. I started with robbing my yard of landscaping rock. I got about five 5-7 inch rocks, fired the stove and got the hot room up to about 190F. After a bit more scavenging, I felt sad about it and went to the big box store and bought a $10 bag of “natural” stone with each rock being about 3 inches wide. Oddly enough, the rock was imported from India—I guess we lack rock here. I emptied the whole bag and sorted the rocks around the stove. Firing the stove this time, I could hardly get it to reach 180 after about 3 hours of burning. I will have to remove some rock to see if things improve. Also, one thing I’ve noticed is that the landscaping rock came covered in some sort or rubbery substance. It took about an hour of burning off and pouring water on the rocks to get it to bubble away. Really hurt the eyes :) One note of advice, you need solid rock like granite NOT limestone. Limestone rocks can explode when heated!

Now I think a big part of a sauna, besides a wood burning stove, is the smell. That’s where scented oils come in. Mixing a few drops with a cup of water and pouring on the rocks, not only hugs you in humid heat, it also clears your sinuses by hitting you in the nose. It’s a hug and punch! Having just bought a few different scents, I really wanted to try all of them. Since my sauna bucket is still in the mail and I didn’t have water right next to me in the hot room, I figured I put straight scented oil drops on the hot rocks to get the smell to release. Well you know what happens to oil with heat? It lights up to a nice flame. Lesson here? DON’T PUT SCENTED OIL ON HOT STONES!

Sauna candle window.

The idea behind the candle window, at least as far as I understand, is simple. When you’re sitting in the hot room, you want to relax. A bright light shining in your eyes won’t help you. However, if you put a candle next to the glass through the hot room, it’ll provide just enough light to see, as well as improve your relaxation experience.

There are only a few things to keep in mind here. First, the glass needs to be made out of tempered quarter inch glass. Tempered glass can withstand something like 400F+ or about 200F more than you need. Second, the placement of the glass in to the framed window opening should be slightly off center to provide space on the window sill on the changing room side to actually put candles. Other than that, simply frame the glass in using half inch trim cut at 45 degrees and repeat on both side. That will hold the glass securely in place. One note of advice, I recommend using electronic flame-less candles—it’s just safer :)

Sauna candle window installed and framed.
Sauna candle window installed and framed. Notice the slight offset towards the hot room to provide a sill to put candles and stuff.

Mar 16, 2016

Building a sauna door from scratch.

After spending some time online trying to find a one source site on how to build a sauna door, I decided to come up with my own design based on pieces of info I found in my web search. Whether the door will hold up, time will tell, but here is how I did it.

The theory was that I needed to build a frame then cover it with insulation and cedar. The problem was that if you look at any door, you don’t see the screws in any of its sides holding the frame together. Another constraint was that both of the long sides of the door frame needed to be solid pieces. Finally, this was going to be a heavy door, but I needed to make it as light as possible. So here’s how I did it.

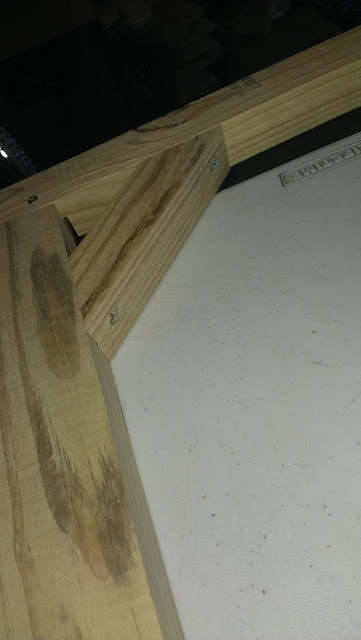
I estimated the door size by allowing for a 2 inch gap below the door for air intake, and .5 inch gap around it for opening and closing. Based on the door rough opening covered with trim, I got my measurements with the above criteria. I then went on to build the frame. I used pressure treated wood for my door frame. The main strength of the door needed to be in the part of the frame that hangs on the hinges (the way I see it). I took a 2x4 and took off about .5 inches from it making it 3 inches wide. I used the 1.5 inch side as the outside of the door frame all around. I made the rest of the frame pieces about 2 inches wide (from the 3.5 inch they came in). That reduced some weight. I then framed up the door with those pieces connecting them together in a form of “lap joints” using outdoor screws. A lap joint is when you cut out squares from the 2 mating pieces of wood and overlap them to make them the thickness of the original pieces. I made sure the frame was square by checking for equal diagonals, and secured the frame together with screws and corner wood pieces. We then took the door frame in to the sauna to see how it fit. It looked good and we could continue finishing it.

Measuring for a lap joint.

Completed lap joint only missing screws.

Lap joint secured.
Lap joint secured.

Corner anchors to prevent the frame from going out of square.

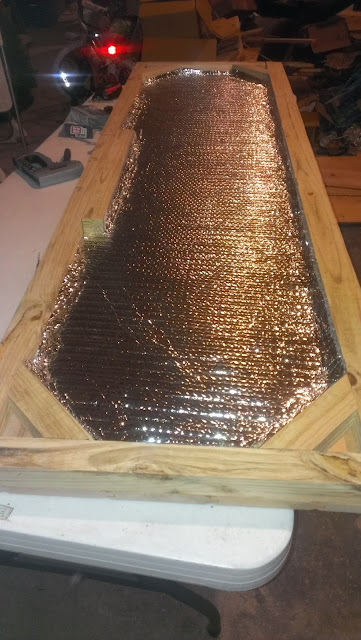
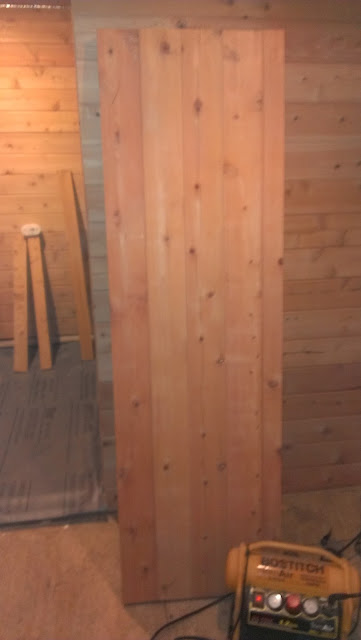
With the frame build and satisfying the above conditions, we proceeded to cover it with the same tongue and grove cedar that I used on the walls. We covered one side by putting up the T&G lengthwise and flipped the door over. With one side covered, I stapled the inside with the remaining piece of foil bubble wrap to make sure the heat didn’t escape through the door.


Door insulation to keep the sauna hot!

Door handle nailing plate.

I also installed a nailing surface next to the frame for the handle that will be added later and marked with a pencil the length of that nailing surface on the outside of the frame. I then went on to cover the other side of the door with cedar T&G. The T&G was attached to the frame with brads. The perimeter pieces were nailed through the cedar to the frame, The inner pieces were only nailed through the top and bottom of the cedar in to the frame.

With the door complete, we took it in to the sauna one more time to check fit. It looked nice. For our hardware, we bought three 4.5 inch hinges, two of which are spring loaded so that the door would close on its own. Leaving about a .25 inch offset, we installed the hinges on to the door frame pre-drilling and installing one screw at a time, so that the hinge didn’t move out of alignment. Once the hinges where secured to the door, we hung the door on to the door opening using at least one 2 inch screw through the hinge in to the studs. Our sauna now had a door and could be used for its real purpose!

Completed custom sauna door.

Completed and hung custom sauna door.

1/19/2017 UPDATE:

Having used the sauna at least 1-2 times per week throughout the year, I am happy to report that the door has not warped or changed shape in anyway. It is still as square as it was from day one.

3/8/23 UPDATE:
Having received a few comments asking about the door hinges, I thought I post a photo of them.

Closeup of spring-loaded sauna door hinge
Closeup of spring-loaded sauna door hinge.


All 3 of spring-loaded sauna door hinges
All 3 of spring-loaded sauna door hinges.


The door uses 3 spring-loaded hinges. I could probably get away with only using 2 spring-loaded hinges, but for aesthetic purposes and to make sure they do their job, I bought 3. After properly adjusting the closing strength, the door works well. 

Hooking up the wood burning stove to the chimney.

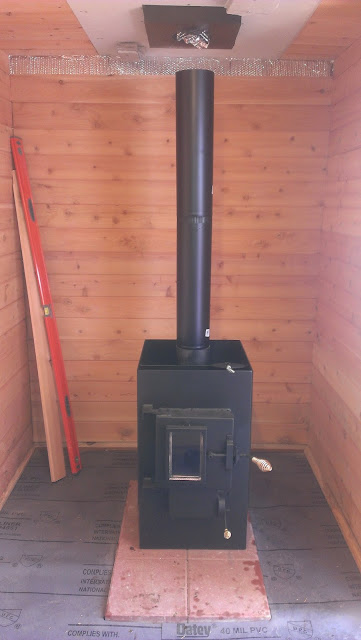
Once we were done with the cedar on the walls and ceiling, we were ready to get the Kuuma sauna stove installed. First challenge was to get it in the sauna building. The beast is made of quarter inch metal and weighs 350 pounds and takes in 100 pounds of FireBrick luckily in a separate box J . We wheeled the stove out of the garage on a dolly, then had 3 guys pick it up and place it in to our sauna building. Once inside, we set it on top of the patio pavers that it will live on and adjusted its position to line up with the chimney in the ceiling. From there, we needed to hook up the stove to the chimney support box with a single wall black pipe. The pipe comes open and needs to be bent and clicked together to assemble like a duct pipe. There are 2 sides to each pipe—a crimped side and a straight side. The pipes are sold in 12 and 24 inch lengths I believe. There may be others. Once I assembled the pipe in to a round stack, the crimped end then went in to the stove. My stove had a hole in the receiving pipe for a sheet metal screw to secure the pipe. I put in my pipe, marked the hole location, took the pipe out, tapped and drilled the hole out.

Single wall black pipe hooked up to the stove.

The stove also requires that a damper is installed in the first pipe. This is a 6 inch pipe which requires a 6 inch damper. I dry fitted the damper in to the pipe making sure that when it opens, the second pipe doesn’t interfere with it. This means I set it about 5 inches from the top of the black pipe. Once I found a good location, I taped and drilled the hole for the damper shaft. Once I got the hole drilled, I installed the damper inside the pipe. When it was in, centered and tested, I used the shaft to tap a mark on the opposite side of the pipe where the shaft will exit. I took out the damper, drilled the tapped hole. Now the damper could be installed fully. With the damper installed, I put the pipe back in to the stove and secured it with a sheet metal screw to the stove where I drilled the first hole. I then attached the second pipe which got me closer to the support box. That second pipe is attached to the first pipe via the crimped end and 3 sheet metal screws.

The support box came with a round smoke collar as part of the kit. I slipped that collar in to the support box. It had 4 holes for screws, but the fit for me was tight and I didn’t feel comfortable making holes in the support box. For my last and final connection to the chimney support box, I used what’s called a 6 Inch Adjustable Stove Pipe Slip Joint. It saves you from cutting your stove pipe and is cheap! The deep part of it slipped over the black pipe I had attached to the stove. The shallow part connects to the chimney inside the chimney support box.  This slip joint is very tightly made to go over the pipe. A trick I used is I sprayed WD-40 on a paper towel and applied it to the outside of the pipe and inside the Slip Joint. I was then able to have it go on the pipe and move freely enough to adjust it. After the first firing, it quickly burned off.

So, now that the Slip Joint was on the black pipe, I carefully slid the Slip Join up and inserted it in to the chimney at the support box. I secured it to the black pipe with 3 sheet metal screws.


With the stove finally hooked up to the chimney, all that was left is to line the fire box with FireBrick according to the installation instruction. Once done, we were ready for our first fire. Daryl, the builder of the Kuuma stove, suggests burning about 3 small paper fires to cure the paint. However, it took us about 3 good wood fires after 3 small paper fires before the paint stopped burning off and the hot room was usable. Don’t rush it, take your time and let it cure.

First firing of our Kuuma sauna wood burning stove.

Wood burning Kuuma sauna stove with the lights turned off.

Hanging Durock protection on ceiling over the wood burning stove.

A quick post about ceiling protection above the wood burning Kuuma stove. According to the instructions for installation, I needed to have 2 half inch Durock layers of protection with a 2” air gap between them. Originally, I was going to use 4 half inch pieces of scrap Durock for spacers to give me the 2” air gap. In the end, what I decided to do is to place 2 2x4s across the ceiling joists. That gave me a solid surface for attaching the last layer of Durock, but they only made up for 1.5 inch air gap. I then added one more half inch Durock spacer over the 2x4 followed by the full sheet of protection Durock. Now that whole thing was solid and looked good with the appropriate 2” air gap.

2x4s to support final layer of Durock above the wood burning stove.