After spending some time online trying to find a one source
site on how to build a sauna door, I decided to come up with my own design
based on pieces of info I found in my web search. Whether the door will hold
up, time will tell, but here is how I did it.
The theory was that I needed to build a frame then cover it
with insulation and cedar. The problem was that if you look at any door, you
don’t see the screws in any of its sides holding the frame together. Another constraint
was that both of the long sides of the door frame needed to be solid pieces.
Finally, this was going to be a heavy door, but I needed to make it as light as
possible. So here’s how I did it.
I estimated the door size by allowing for a 2 inch gap below
the door for air intake, and .5 inch gap around it for opening and closing.
Based on the door rough opening covered with trim, I got my measurements with
the above criteria. I then went on to build the frame. I used pressure treated
wood for my door frame. The main strength of the door needed to be in the part
of the frame that hangs on the hinges (the way I see it). I took a 2x4 and took
off about .5 inches from it making it 3 inches wide. I used the 1.5 inch side
as the outside of the door frame all around. I made the rest of the frame pieces
about 2 inches wide (from the 3.5 inch they came in). That reduced some weight.
I then framed up the door with those pieces connecting them together in a form
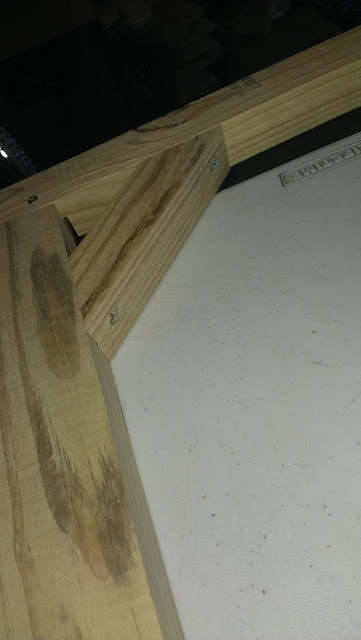
of “lap joints” using outdoor screws. A lap joint is when you cut out squares
from the 2 mating pieces of wood and overlap them to make them the thickness of
the original pieces. I made sure the frame was square by checking for equal
diagonals, and secured the frame together with screws and corner wood pieces.
We then took the door frame in to the sauna to see how it fit. It looked good
and we could continue finishing it.
 |
| Measuring for a lap joint. |
 |
| Completed lap joint only missing screws. |
With the frame build and satisfying the above conditions, we
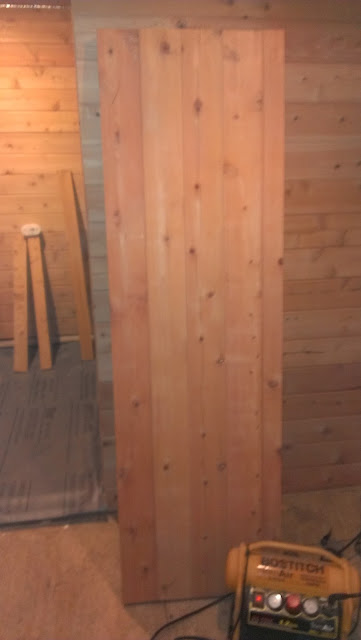
proceeded to cover it with the same tongue and grove cedar that I used on the
walls. We covered one side by putting up the T&G lengthwise and flipped the
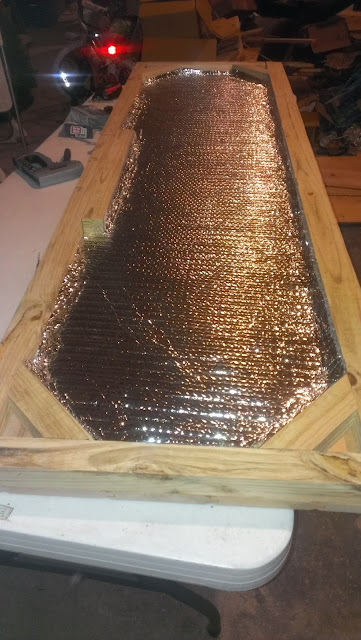
door over. With one side covered, I stapled the inside with the remaining piece
of foil bubble wrap to make sure the heat didn’t escape through the door.
 |
| Door insulation to keep the sauna hot! |
 |
| Door handle nailing plate. |
I also installed a nailing surface next to the frame for the
handle that will be added later and marked with a pencil the length of that
nailing surface on the outside of the frame. I then went on to cover the other
side of the door with cedar T&G. The T&G was attached to the frame with
brads. The perimeter pieces were nailed through the cedar to the frame, The
inner pieces were only nailed through the top and bottom of the cedar in to the
frame.
With the door complete, we took it in to the sauna one more
time to check fit. It looked nice. For our hardware, we bought three 4.5 inch
hinges, two of which are spring loaded so that the door would close on its own.
Leaving about a .25 inch offset, we installed the hinges on to the door frame
pre-drilling and installing one screw at a time, so that the hinge didn’t move
out of alignment. Once the hinges where secured to the door, we hung the door
on to the door opening using at least one 2 inch screw through the hinge in to
the studs. Our sauna now had a door and could be used for its real purpose!
 |
| Completed custom sauna door. |
 |
| Completed and hung custom sauna door. |
1/19/2017 UPDATE:
Having used the sauna at least 1-2 times per week throughout the year, I am happy to report that the door has not warped or changed shape in anyway. It is still as square as it was from day one.
Having used the sauna at least 1-2 times per week throughout the year, I am happy to report that the door has not warped or changed shape in anyway. It is still as square as it was from day one.
3/8/23 UPDATE:
Having received a few comments asking about the door hinges, I thought I post a photo of them.
 |
| Closeup of spring-loaded sauna door hinge. |
 |
| All 3 of spring-loaded sauna door hinges. |


The door is meant to open outwards
ReplyDeleteThat's correct-- the hot room door opens outward.
Deletenice...a know-it-all who fails to notice the details...classic.
DeleteGreat door, btw!
Your door is about 3" thick -- thicker than most doors. Did you have any problems installing the hinges?
ReplyDeleteI have built a door using your basic technique: 2"x4"'s as the frame, with tongue and groove on both sides. I contacted The Hinge Outlet to check that their 4.5" x 4.5" spring hinges would work. They told me my door was too thick. Their hinge was not designed for this thick a door!!!
I then posted the question on the SawMillCreek forum about my door, which can be viewed here: https://sawmillcreek.org/showthread.php?289351-Custom-door-too-thick-for-regular-hinges&p=3095043#post3095043
Also, did you find you needed the third hinge to support the door?
Any advice would be helpful.
I went and looked at the door earlier today. I have used 3 what looks like 4"-5" hinges. They are the spring loaded ones meaning they close the door if you don't hold it open. Each of the hinges has enough space for the mounting bolts to screw in to the frame of the door. The door gets slammed a lot, the kids play with it-- it's been working without issues for like 5 years now.
Deletedo you have a link to the hinges you used? Building a similar door. Want to make sure the hinge screws hit the 2x4 frame at center and not anywhere on outside layers of tongue and groove. Much thanks!
DeleteI don't have the exact link. When I needed the hinges, I just went to Home Depot and picked up what I needed. I just updated this post with the photos of the hinges. You can take a look at the bottom of the post. Any spring-loaded hinge that fits your size will work. There's a good variety of size available.
DeleteJust used your idea and built a very similar door, thing is rock solid. Had to trim a little off the side of the door so it would clear the door jamb, but other than that worked great. Thanks for the post!
ReplyDeleteThat is awesome! Thanks for coming back and posting. I'm glad I could help.
Delete