
 |
| The plan when it all began. |
 |
| Staking out the site. |
 |
| Clearing the site. |
 |
| Build a box the size of the building to see true dimensions. |
 |
| Drill and fill footings. |
 |
| Make sure you're below frost line. |
 |
| Check layout again. |
 |
| Install supports on footings. |

Read More: Leveling the site for posts and beams
 |
| Build supports by notching. |
 |
| Notching 6x6 posts |

 |
| Tools for working on the posts. |
 |
| Attach posts to footings with Simpson ties. |
 |
| Skids attached to posts. |


Read More: Floor framing and joist blocking- building.
 |
| Extra corner bracket for safety |


 |
| Joists perpendicular to skids. |

Read More: Floor framing and joist blocking- building.
 |
| Hurricane ties on each joist. |

 |
| Plan for staggering subfloor sheets. |
 |
| Staggered subfloor sheets. |
 |
| Pre-built trusses and lumber delivery. |

Read More: Insulating the floors with rigid insulation.
 |
| Wall framing is done. |
 |
| Adding sheathing to roof and walls. |


 |
| Roofing spacers. |
 |
| Framed window. |

 |
| Double top plate. |
 |
| Hurricane ties for trusses. |
 |
| Framed soffits. View underneath. |
 |
| Framed side and front soffits. |
 |
| These top plates were supposed to be staggered. |
 |
| Trusses leveled with 2x4s. |
 |
| Trusses view from the inside. |


 |
| Roof sheathing. |
 |
| Roof and soffit. |
 |
| Sheathed roof. |
 |
| Front entry door is framed. |
 |
| Soffits are covered with aluminum. |
 |
| House wrap around the sheathing, under siding. |
 |
| Siding the soffits. |
 |
| Ice and water on the whole roof. |

 |
| Starter shingles over Ice and Water. |
 |
| Peak of the roof, silicone nail on the last piece. |
 |
| Window opening preparation. |
 |
| Silicone around window to prevent water damage. |

 |
| Tape over window. |
 |
| Siding cutout for outside lights. |
 |
| Junction boxes for outside lights. |
 |
| Outside flood light and outlet for convenience. |
 |
| Outside is complete. |
 |
| Wiring can lights. |
 |
| Wiring switches. |
 |
| Lights are all done. |
 |
| Attach wire 6" above junction box. |

 |
| Framing the hot room and candle window. |
 |
| Hot room with mock stove placement. |
 |
| Hot room door opening framed. |
 |
| Plumb bob to location of stove from ceiling. |
 |
| Tools for cutting opening for chimney. |
 |
| Starting hole for chimney. |
 |
| Hole is complete. |
 |
| Install chimney hot box. |

 |
| Frame around chimney hot box. |
 |
| Install chimney. |
 |
| Installing the chimney cap. |
 |
| Hotbox fully framed. |

 |
| Ceiling insulation 36" thick. |
 |
| 36" Ceiling insulation. |
 |
| Wall batt insulation. |

 |
| Insulating the hot room inside walls as well. |
 |
| Duct tape to hold insulation in place before the ceiling is done. |
 |
| Chutes to prevent insulation from falling in and covering the soffit air flow. |
 |
| Insulation chutes installed. |

 |
| Hot room insulation complete. |
 |
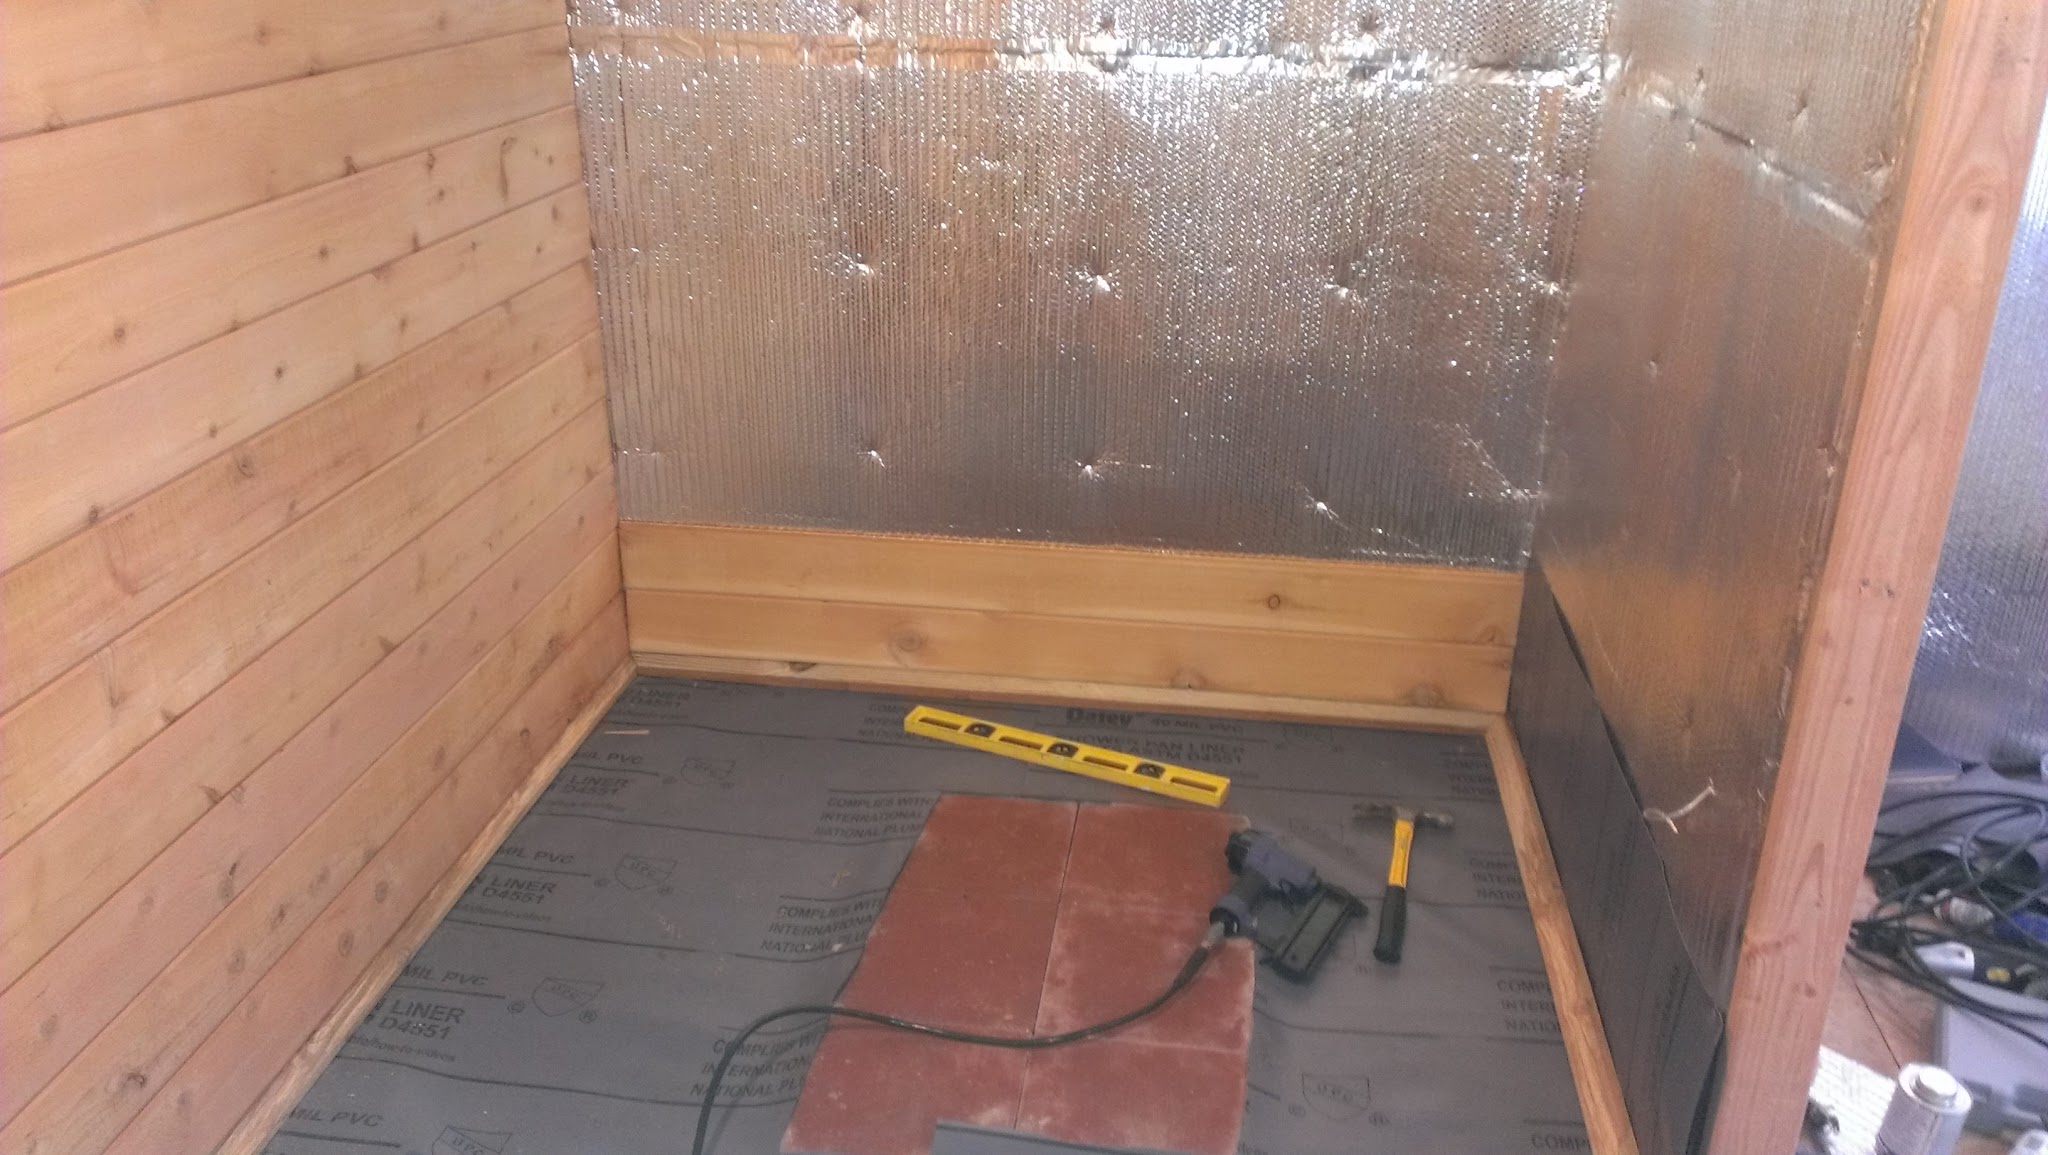
| Bubble foil insulation over batt insulation to lock in heat in the sauna. |


 |
| You can see the insulation working-- no heat, just lights and the glass is fogging up. |
 |
| DuRock for the hot room floor with drain and stove pad. |
 |
| Garden brick pavers for supporting the stove and protecting the floor. |
 |
| Road trip to pick up the sauna stove. |
 |
| Kuuma wood burning sauna stove! |
 |
| Kuuma medium size wood burning stove. |
 |
| Cut opening in cement board for the hot box. This prevents the heat from catching the ceiling on fire. |
 |
| Cement board ceiling shield first part is installed. Will install 2nd part with a 2" air gap to dissipate heat. |
 |
| Adding curve to the floor with sleepers for water to drain down the drain. |
 |
| Cover floor with cement board. |
 |
| Cover cement board with waterproof shower liner. |
 |
| Waterproof rubber membrane for the hot room floor. |
 |
| Should have run the membrane under the foil insulation, not over. |
 |
| Starting the hot room cedar tongue and groove walls. |
 |
| Cedar tongue and groove. |

 |
| Built-in hot room sauna speakers. |


 |
| DuRock ceiling protection from stove heat. |
 |
| Hooking up the sauna stove. |
 |
| First stove firing. |
 |
| Building overlapping sauna door framing with green treated wood. |

 |
| Corner supports to brace the sauna door framing. |
 |
| Candle window tempered glass is installed. |
 |
| Sauna door is ready to be hung. |
 |
| Built from scratch sauna door is installed with an air gap below for fresh air. |
 |
| Building sauna bench framing from green treated wood. |
 |
| Covering benches with poplar wood. |

 |
| Sauna benches and supports installed. |
 |
| Sauna bench supports. |
 |
| Outdoor sauna shower to cool off in the summer. |


 |
| Sand topping cement mix for sauna floor. |
 |
| Mixing cement for the sauna hot room floor. |
 |
| Cementing sauna floor over shower liner. |


 |
| Carefully maintaining slope around the drain. |


 |
| Tools used to mix and cement the sauna floor. |
 |
| Sauna cement floor is complete and dry. |
 |
| Firing the sauna stove with the completed cement floor. |
 |
| Where the heat from a wood burning stove goes. |
 |
| A TV in the changing room improves the sauna experience! |
What was the build cost of this sauna in CAD dollars
ReplyDeleteAli, not sure what the exchange rate was back in 2016, but from the calculations I kept, it was slightly under $10k USD
ReplyDelete