Sep 29, 2015

Roofing, Underlayment, Shingles, Soffits, House Wrap and Windows...

I am starting to see how this works. If I don’t make 3 trips to the improvement store, the day is not over. Also, Pizza every Saturday is now getting predictable J

The plan for this weekend was grand. We wanted to:
-finish the soffits and fascia
-put down the ice and water membrane/underlayment
-put down shingles
-put up the Tyvek
-put in windows

The buddy who does siding for a living took up the fascia/soffits. One thing I learned is that the long sheets of soffit material do not go on the overhang as is. Instead, they get cut down to little rectangles that get put up from overhang to the building. So plan on that when buying material.

Drip edge over fascia with soffit below.

2x6 Fascia that will get covered up with aluminum and soffit below.

Return box being fabricated.

The day started with me putting up the drip edge on the eaves. Note: the drip edge gets put on first on the eaves, with Ice and Water membrane going on top of the drip edge. However, for the gables, the drip edge gets put on top of the Ice and Water. Ice and Water, by the way, is the name of the rubbery underlayment that is used on eaves and gables. Read further to find out more J.

The roll of the Ice and Water is pretty heavy to work with. So I measured the length of the roof, added some wiggle room and cut off a piece of the membrane on the ground. Then, rolled it up and took it up on the roof. Each piece has 2 white plastic sheets on the bottom side, and one small plastic strip on the opposite side. We’ll call that the top. We lined up the underlayment with the drip edge and left some slack on the gables to be cut off later. We rolled out the underlayment with the small strip of plastic facing up toward the sky and towards the roof peak. Once we had everything where we wanted, we took the top large sheet of plastic from the bottom of the underlayment and pulled it off to expose the glue. The underlayment was now glued from the top half. We then took the remaining bottom plastic piece off of the underlayment and now the whole thing was secured to the roof. We then went and put a few T50 staples through the little plastic strip that was facing up. The instructions don’t really say what that piece is and initially we thought we had to take off that plastic from the strip to expose the glue. As we found later, there was no need—the plastic stays on.

Also, I had read somewhere that the Ice and Water underlayment needs to cover at least 1 foot of the heated space. It needs to be put down on the eaves as well as the gables. With those 2 rules, I’d have most of the roof covered in the Ice and Water anyway, so I decided to ditch the cheaper felt paper and do the whole roof in Ice and Water. They also say it’s better that way—though more expansive. I ended up needing 3 rolls at $45 each.

Our next strip, we did the same thing. Cut the length of the roof with some extra on the ground, got it up on the roof, lined up the new piece to the bottom of the small plastic strip sticking up on the previous sheet, peeled the plastic from the bottom, glued the sheet and put staples through the upper strip.

We continued to lay 3 strips on each side of the roof while leaving the ridge of the roof to be done last. Once both sides were complete, we again cut a whole length sheet and put it over the ridge making sure it equally overhung on both sides of the roof. The sheet was again glued by peeling the backing and stapled.

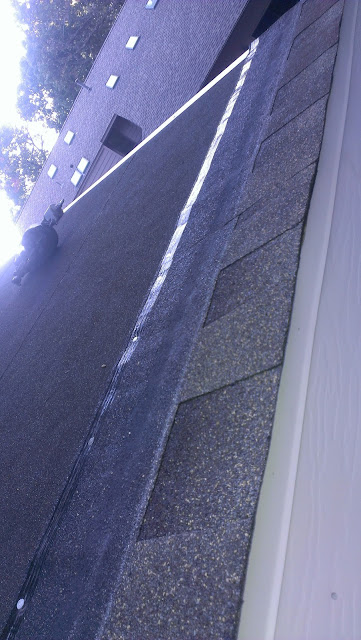
After the underlayment was complete, we added the Drip Edge over it on the gable sides.

Ice and Water underlayment with drip edge.
Drip edge over the Ice and Water underlayment on the gables.

Next we were ready for shingles, but first, we had to put down the starter strips on both eaves. The starter strip looks just like the Ice and Water, with one difference that it has blots of black glue on one edge. That glue needs to point up to the sky and be towards the eave’s end. When shingles are placed on top of it, the heat causes the first row of shingles to fuse to the black glue and holds them from coming up in the rain/wind.

Starter shingles at the edge of the eaves.
The shingles starter roll with the glue blots before the shingles go up.
                         
When I went to the store to buy shingles, there were 2 different types I needed. One package of the Ridge shingles—those that go over the ridge. And, 11 boxes of the regular shingles. On a side note, it’s amazing how now every trip to the store is at least $300.

So the rule with shingles is pretty simple. First row needs to hang over the drip edge around ¼ inch. Once the first row is laid, if you look at the shingle, there’s 2 chalk lines on each piece. The top one, you use to put 6 roofing nails through equally spaced. The bottom line is what you use to line up the next row of shingles by. Finally, because once again, all the butt joins need to be staggered, the following rule is used. For the first row, you start with a full shingle piece. 2nd row, you cut a ¼ off the first shingle and start the row that way. You then use that ¼ piece on the end. Next row, you’re down another fourth, so at this point, you start with ½ of a shingle piece. Next row ¼ piece, the following row, a full piece once again. If you do that, you’ll notice that each subsequent row covers the butt join of the previous row very nicely.
First row of shingles is nailed on.
First row of shingles over starter roll.

In the midst of one of my trips to the store, the guys put up the house wrap for me. I basically bought a 9’ roll. And, since I have about 7’ walls, things worked out perfectly. The wrap was lined up to the eves and rolled around. We saved a few dollars by using regular staples to hold it in place instead of the specialized plastic-top nails. We’ll just be extra careful not to rip it. Otherwise, there are marking on the wrap for where the nails should go, so we put staples through those markings and called it good.

Tyvek house wrap going on around the outside of the sauna.
Small red dots on the paper is where the staples/nails go.

The fun thing with building this sauna is that I have all sorts of help available from my friends. So while 2 people were doing shingles on the roof, me and another guy took on putting in the windows.

For the windows, the following things needed to be done. The house wrap was cut such that the “wings” were folded inside the window rough opening on the sides and bottom. (They suggest a reverse-Y cut to be made) They were stapled from inside the building over the window opening. A special window membrane/underlayment was placed on the bottom sill and half way up the sides of the window rough opening as well as the outside wall. This protects the wood from standing water.

Window underlayment on the bottom of the window opening to prevent water rot.
Window underlayment glued then cut in to shape.

A bead of caulk was put around the outside of the window opening and the window itself was put in. Once it was shimmed from inside on the bottom and leveled, 2 nails were put in to each of the 2 top corners. The window was then shimmed and leveled on the sides, and the bottom corners received 2 nails as well. At this point, the window was secured from being out of square, and the rest of the nails were put in. Once it was all nailed up, a special aluminum tape was put over the nails on both sides of the window first, and the last strip was put over the top making sure that it extended past the side tape on both sides. And with that—both the windows were done.

A bead of silicon underneath the window to seal everything from the elements.
Caulk the window opening for better seal.


Ready to put in the window.
Ready for the window to be put in.

The window nailed in with protective foil around all but the bottom sides.
And it's official!
Once again, it was a full day of work that started at 10a and we got a lot done. However, we ran out of daylight and so, we still need to finish the shingles, the fascia on the back of the building and get started on the siding, but as the temperature outside gets cooler, we’re moving right on schedule to getting the exterior done so that we can start on the inside.

More info can be found from the following links off of my resources page:

Installing Ice and Water membrane, Felt and Drip Edge:
http://www.finehomebuilding.com/how-to/video/replacing-roof-series-apply-drip-edge.aspx

How to shingle a roof:
http://www.oneprojectcloser.com/how-to-shingle-a-roof/

How to shingle a roof (more):
http://www.building-a-home-info.com/architectural-shingles.html

Sep 15, 2015

Covering the roof with OSB sheathing and building soffits.

The goal of this weekend was to get the roof covered and to put the soffits in. I went out on Friday and bought materials-- $$$. There were a few things we needed. Luckily, the 28 sheets of OSB we bought will be used on the roof as well. I had the option of doing wooden soffits like my main house has, or aluminum. With wooden, there is the deal of maintenance and painting. With aluminum, there’s no upkeep and they’re already painted and pretty cheap. That’s the route I decided to take. So, I needed to buy a few things.

- Drip edge—this gets installed around the roof ends all the way around to guide water away.
- Vented soffits.
- J-channel and F-channel to hold the soffits in place
- Fascia
- 2x6 lumber for fascia all around the roof (not just the sides, but also the V parts.
- White nails to nail the aluminum material
- Roof clips that hold the plywood sheets together on their long sides
- 2x4 for framing the soffits and overhang ladders
- Something called Ice and Water—a membrane that gets put on the bottom parts of the roof to help seal out water and ice dams
- Felt paper for the rest of the roof—again to seal out water.

See this video for drip edge installation and Ice and Water membrane installation. NOTE: the Ice and Water membrane needs to cover at least 1 foot of heated space. So if your eves are 2 feet, you need at least 3 feet of Ice and Water from the eves up the roof.
http://www.finehomebuilding.com/how-to/video/replacing-roof-series-apply-drip-edge.aspx

The next day, work began. I got another buddy who’s in construction who stopped by to help. At first, a chalk line was run through the truss overhangs to make sure they were all level. They weren’t. So, they were trimmed along the line to make them line up in one straight line. Next, the front and back overhang lengths were calculated and added to the 14 foot wall. That’s how long the fascia 2x6 board was cut. It was then nailed to the truss ends. After that, work on covering the roof began. Starting from one corner and leaving extra OSB to later be cut on the front of the building and to accommodate the overhangs, a sheet was placed flush with the fascia on its 8’ side and stapled to the trusses with Crown Staples. Another sheet went to the left of the first sheet. Once the first row was filled, the roofing clips where put on the 8’ side and the next row of plywood was installed in a staggered way-- like we did the floor. Once one side of the roof was covered, we moved on to the next side. When the roof was done-- the work on the overhang began.

I read somewhere that doing an overhang with 2x4 ladders can only overhang 12 inches. Anything longer has to follow the rule of 1:2. For each foot of overhand, there should be 2 feet of a 2x4 attached on the roof side.  To do that, you either use special end trusses (which I didn’t get :) ) or notch the trusses and run the 2x4s through the notches. I decided to go safe and stayed with only a 12” overhang. The ladders were built out of 2x4s and attached to the front of the building. The overhanging OSB was later stapled to the overhangs, and excess OSB was cut off with a circular saw.

First sheet of roofing sheeting goes on after the 2x6 fascia was nailed to truss ends.
Once the roof was fully covered in sheathing, we could then remove the wall bracing we put in when putting up the walls. Now we had room to walk around the inside and do more planning on the layout.

Unfortunately, we ate up some hours in the beginning with tool malfunctions so we started a bit late. So, we didn’t get a chance cover the roof in felt or finish the soffits, but we still have a few warm weekends left and the sauna is progressing really well.

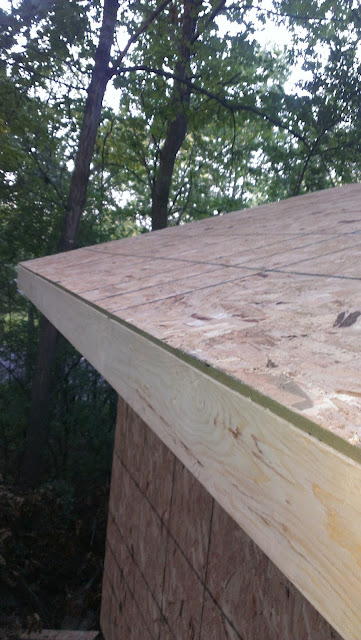
Closer look at how the 2x6 fascia is nailed to truss ends.

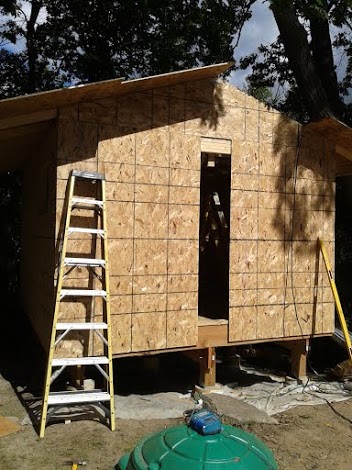
Roof and wall sheathing in place.

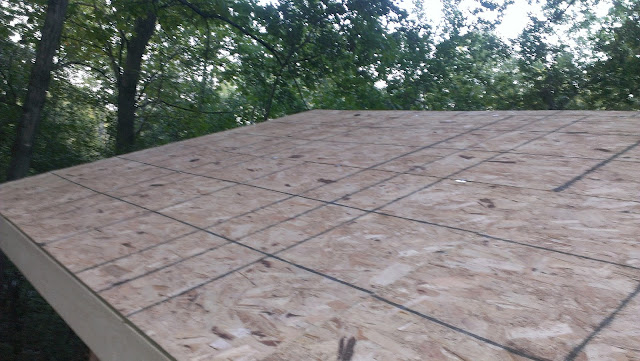
One side of the roof is done.

Sheathing the rest of the entry wall and the other side of the roof.

Again, fascia board is nailed on the trusses.
Again, fascia board is nailed on the trusses before sheathing starts.

Framing the gables overhangs.
Overhang ladders framed.  


Overhangs framed and done with fascia nailed on them.


Another look at how the overhangs are framed.

More views of the overhangs.

Return box framing.
Return box framing.

Roof sheathing flush with fascia.

Roofing clips used to connect sheathing sheets together.

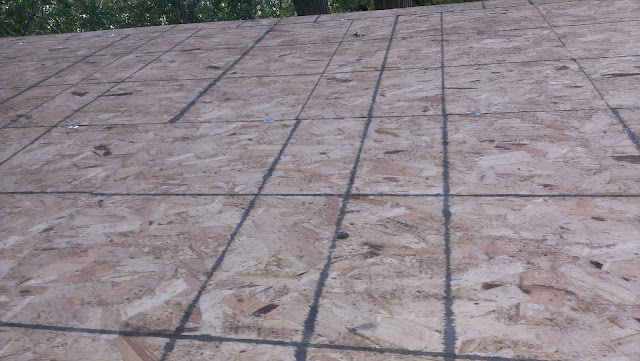
OSB Roof sheathing spacers view.

Finished view of one side of the roof sheathing.

Framing walls and attaching trusses in one day.

Well, today was gonna be a busy day. It’s been raining heavy at night, and was raining on and off in the morning. However, I had made plans a week ago, with my buddy who’s been in construction for a while, that he will come over and help me put up the walls and trusses. No rain will stop us now!

So this is where it gets fuzzy. Because we were rushing to get as much done as possible while I had his help, I missed getting any photos of the work as it progressed. However, I’ll try and do my best to recollect what we did and how.

At first, we nailed the ¾“ pressure treated plywood sheets to the floor over the rigid insulation. I decided not to glue the floor or the insulation. The sheets were placed such that the butt joints are staggered to provide a more solid floor. Also, 2 butt joints met right in the middle of each joist to have enough room to secure both sheets.
How the subfloor sheets are staggered.

The sheets were nailed with galvanized nails with ring shanks. Those rings help hold the plywood from moving up over the years. I also plan to go back and put some screws in for a better hold.

The parts of the plywood hanging over the floor frame get simply marked with a chalk line and cut off using a circular saw.

Subfloor complete.
Subfloor complete.

Staggered subfloor.
Staggered subfloor.

The next step was to go around the perimeter of the floor and using a corner angle to get 90 degree corners, we marked off placeholders for walls’ bottom plates. It was basically a 3” offset from the edge (to accommodate the wall 2x4 bottom plate) around the perimeter marked with a chalk line. We started with the 14 foot wall on the right side of the building. At first, the bottom plate was put on its side against the floor (the 2” side, not the 4”) and the top plate was put right next to it the same way. All the studs were marked at 16” on center on both the top/bottom plates. The window location was marked as well. Then, the top plate was taken away and the bottom plate placed right along the marked chalk line and nailed in 3 places to the subfloor. Again, while laying on its side. These nails would hold it temporary from moving while the wall is assembled. The nails would come out once the wall was tilted up.

So, with the top and bottom plates of the wall separated out, we laid out the studs. Remember, saunas have a 7 foot ceiling, not 8, so cut your studs to 7 feet minus the 3” to accommodate for the bottom and top plate. So a stud should be 7’ x 12”= 84” – 3” = 81”. One thing I learned—the stores sell 7’ studs. I thought 8’ was the shortest- could have saved $.

At this point, without nailing anything, the window rough opening was framed out as well. The windows I bought had both a window size and a rough opening dimensions printed on the packaging. We used the rough opening values to frame the opening. We used the left overs of the 2x10s for headers and regular studs for the rest of the window framing. Study the photo to learn how a window is framed:

Framing a window rough opening.

Once everything was cut and laid out, the studs were nailed to first the bottom plate then the top plate by lining up the 16” on center marks we made in the beginning. Once the wall was nailed up, we measured the diagonals to make sure the wall was squared. Once everything was good, we were ready for plywood sheathing.

The sheathing comes in ½” thickness of 4x8 sheets of OSB (cheap $8/sheet) (not pressure treated). We bought 28 sheets.

Starting from one side of the wall and placing the 8’ side of the OSB sheet from top to bottom, the sheets were placed on the wall. The top of the sheet was placed on ½ of the thickness of the top plate and the bottom piece hung below the bottom plate. The sheet was then attached to the wall using special U shaped staples with a special air gun. I later learned they’re called Crown Staples. Seemed like it was stapled every 6” or so on every stud and bottom/top plates. If you look at the OSB sheets, they are marked with black lines on one side—those are guides for nailing. It’s important that that side of the OSB go to the outside of the building. Also, remember to cut the sheets if necessary such that 2 sheets can meet together on a stud.

Crown staples used to attach the sheathing.
Crown Staples spacing
The rest of the sheets were added to cover the wall with the last piece measured and cut before being attached. We now had one wall framed, with a rough opening for the window, and sheathing attached to the outside. We were now ready to raise the wall. With 3 of us at different corners, we raised up the wall to be vertical. The nails that held the bottom plate temporarily in place came up on their own and the wall automatically stood up right on the chalk line we placed earlier. I was amazed. After making really small adjustments to how the wall set on the chalk line, it was nailed to the floor with 2 nails by every stud. Then, the wall was braced on the outside to the rim joist with left over 2x4s to keep it from falling just in case.

Up next was the opposite wall. Exactly the same framing. Once it was tilted up and secured, the front entrance wall was framed on the 3rd wall. A rough opening for the entrance door was framed with an extra inch on each side and the wall was tilted up and secured to the floor. The back wall was last and easiest to frame because there were no doors or windows.

Entry door rough opening framing.
Door rough opening frame

Once all 4 walls were up and secured on the bottom, they were then leveled with a level and secured to each other. We now had 4 walls. 2nd top plates were then nailed to the tops of the walls and the joints were staggered with the initial top plate joints.

Double top plate.
Double top plate.

Before the trusses could come up, we went around and leveled and braced each wall to the floor. A long 2x4 was nailed to the top of each wall in the middle. Then, in the middle of the building floor, 2x4 blocks were nailed to about a foot height. While one person stood with a level against a wall confirming everything was good, the other person nailed the long 2x4 support to the floor blocking securing the top of the wall from going anywhere while the trusses were installed.


Squaring the walls and bracing for roof sheathing.
The photo is from the future-- but shows the bracing I'm talking about

Next were the trusses. With only a 12’ span, they were pretty light—around 30lbs each. Just like studs, the top plates were marked every 24” on center for the locations of the trusses. We had 2 people placing them upside down (the peak facing the floor) on the top of the walls. Once two guys climbed up the ladders on both sides of the building, they tilted the first truss up and nailed it to the top plates at the marks flush with the outside wall. It was toe nailed on both sides through the truss gusset plates along both walls with a regular hammer. Now this part I didn’t see clearly because I was on the bottom and it was dark, but I believe 1 8-10” long nail was also put in to the end of each truss to connect it to the top plate of each wall. Same was done to the rest of the trusses which were placed 24” on center. I plan on adding hurricane ties as well when I have some time.

Hurricane ties attached to all trusses.
A lesson I learned is make sure the middle of the hurricane tie is above the top plate so it doesn't interfere with the ceiling when it comes later. This particular tie was later re-done. 
Hurricane ties attached correctly this time.
see the difference? :)

Once all the trusses were up and secured on both walls, they were braced through the middle by running a 2x4 through the top of the rafters, marking 24” centers and securing the trusses at the markings with nails. Finally the first and last trusses were leveled vertically with a level and braced.

Bracing the trusses.

More bracing of the trusses.

At this point, it was around 9p, and dark. We used a light to finish our work. Unfortunately, we did not get to sheath the roof, or finish building the eves and soffit or the front and back overhangs. That’s a job for the next weekend. :)

Sep 9, 2015

Insulating the floors with rigid insulation.

With the extra day off due to the Labor Day weekend, I had some extra time to Labor J Also, my order of studs and trusses was delivered this morning!

Roof trusses being delivered.

Trusses and studs ready for building.

As you recall, I was on the fence about insulating the floor. On the one hand, I was told it wasn’t necessary and personally didn’t want to spend more money on things I didn’t need. However, my biggest fear was that I’d have a sauna that’s not quite hot enough. While gathering more info on saunas from the web, I stumbled on this website:

I really liked the lighting he used. After emailing back and forth, he confirmed my fear of a cold floors, so I went ahead and opted to insulate.

I learned all I needed to know about insulating the floor from this great video:

One piece of advice is to make sure the rigid insulation you purchase is acceptable in an outdoor environment- not all of them will stand up to the elements. I went with Owens Corning FOAMULAR 150 2 in. x 4 ft. x 8 ft. R-10. I believe the 250 one is acceptable to be buried in the ground, but since we don’t need to do that—saved a few bucks.

There was 2 of us working, and surprisingly, it took a lot of time to finish—still not sure why. We worked from about 12p-8p and got it done. As we were running out of time, 1 thing we did differently from what the video recommended is instead of nailing wood blocks to hold the insulation in place, we nailed 2 galvanized nails in each place that needed the support. They were nailed 2” from the top of the joist—the thickness of the insulation. It seemed fast, easy, and I think will serve the same purpose just as well.

Nails used to hold the rigid insulation in place.

View of floor rigid insulation in place from underneath.

It was late when we finished placing and bracing the insulation, so we would attach the plywood the next day.