Showing posts with label creosote. Show all posts

Aug 2, 2022

Chimney Sweeping and Soot Cleaning

 Searching through my previous posts, it seems that the last time the chimney was cleaned was in 2018. Today, I finally got around to doing the dreaded dirty deed. Running the stove consistently once per week for 4 years, I think it was time.

The two things I hate about sweeping the chimney are:

1. Climbing up on the roof.

2. Taking the pipes apart and putting them back together.

This year, I figured I try and make it easier and sweep from the inside. Since the pipes need to be taken apart going from the stove to the ceiling anyway, as I need to catch the debris, sweeping from the inside was worth a try. This part was definitely a win. Worked just fine and got the pipes clean. No need to be on the roof. Just make sure the chimney brush doesn't knock off the chimney cap. You'll feel when the brush pops out of the chimney.

The separating of the pipes is of course a pain. Partially, because they rust due to humidity. However, my biggest PITA is the top pipe that slides on the collar pipe near the ceiling. It's a very tight fit. To get it to slide, you need to put WD-40 or something slippery on it. The problem is that after a few twists, WD-40 dries up and you're stuck with the pipe being too far in and it doesn't want to move. This is even worse in reverse, when trying to put the pipes back.

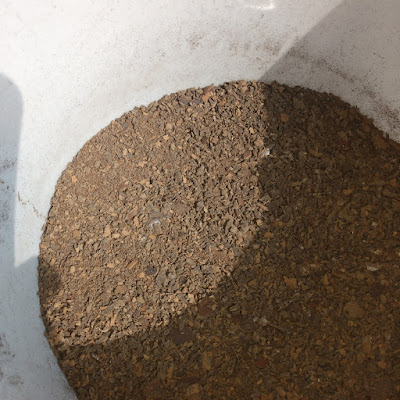
Once I was able to separate the pipes and get them out of the way, here's what I found:

Soot inside the stove.

Soot inside one of the pipes.
Soot inside one of the pipes- creosote.

Soot inside the dampener pipe.
Soot inside the dampener pipe.

Soot inside the collar pipe in the ceiling.

Some collected soot along the way.

As much of a pain as this was and always is, I'm glad I got the cleaning done. Now I can enjoy a few more years of sauna without worrying about a fire or inefficiency of the burn.

Do you have any tips that you've picked up which make this job easier? Especially removing the pipes. Please share in the comments.

Aug 16, 2018

Sauna cleaning- chimney sweeping and disinfecting

Every year, usually in spring time, we try and spend one day on cleaning out the sauna. After using it one to two days per week over the course of a year, there’s a lot of dirt that builds up on the floors and grime on the benches. Also, it’s been about 3 years since we cleaned the chimney, so we figured it should be done as well. We started with the chimney first.

I looked online and found a local hardware store that sold a 6” chimney brush and chimney extension rods. Two points I should mention here:

1.  The size of the chimney brush must match the size of your chimney. We have a 6” chimney, thus I bought a 6” brush.

2.  We have a stainless steel chimney. Stainless steel chimneys require a poly brush—not metal. Metal brushes will scratch a stainless chimney.

With both the brush and rods in hand, we went up on the roof. While being up there, we also swept the roof clean of branches that have accumulated as well as trimmed a few branches that have grown. With that done, we removed the chimney cap. 

Removing the chimney cap

It was amazing how dirty the cap was. Between spider webs and creosote, it was pretty restricted. The cap was brought down to the ground. Next, we were trying to figure out how best to clean the chimney. We decided it was best to take apart the pipe going from our stove to the support box in the ceiling. After unscrewing the screws holding the pipes together, we tried to get the pipes to move. After being used for 3 years, some rust developed welding them in place. Also, there’s about an 8 inch pipe that sits in the support box. The black pipe that attaches to it, needs to slide up that 8” pipe in order to make room for the bottom pipes to be removed. A trick I learned is to use some WD-40 on that 8” pipe in order to get it slick for the lower pipe to slide on it. That WD-40 will then burn off. After some addition of elbow grease, we were able to get the pipes to move.

Having removed the lowest pipe, we used a vacuum to vacuum out all the creosote that has accumulated inside the stove. We then put a bucket underneath the pipe that was still hanging and used our brush from the roof to push through the chimney and the rest of the pipes.

Putting the chimney brush in to the chimney to sweep
Putting the chimney brush into the chimney to sweep

The creosote then collected in the bucket. We then used the brush to clean out the first pipe that we took off from the stove as well as the dampener inside of it. Once we could see through the pipes & chimney that all were clean, we assembled everything back together with the help of some more WD-40 on the top pipe near the support box.

Creosote from the chimney

More creosote from the chimney

You always hear that creosote causes chimney fires. We now had a bucket of creosote. I couldn’t help but experiment with it. I took a piece out of the bucket, put it on the ground and lit it on fire. The piece didn’t have a flame but seemed to smolder very well for a good while.

Smoldering creosote
Smoldering creosote

With the chimney cleaning complete, we were on to cleaning the rest of the sauna. First, all the furniture was removed. Then, the rug in the changing room was removed followed by all the benches from the hot room. The floors were then swept and mopped with some antibacterial mixed in to the mop water like Mr. Clean or Pine Sol. The floors were left to dry.

For the benches, I’m lucky enough to have a pressure washer. I once found online an antibacterial solution that’s used for sauna benches. The product is called Super Puhdas Sauna cleaner. Supposed to be safe on wood. I ordered a bottle online the first time I cleaned my sauna. 

Super Puhdas Sauna cleaner

I mix some into a water bucket then using a plastic bristle brush dipped in to the water, begin to clean the benches. This gets rid of the nasty sweat that has accumulated from a year’s use.

Sauna cleaning solution

The benches then get power washed to further remove the grime.

Power washing the sauna benches

I use the same solution to clean and disinfect the folding lawn chairs we use in our sauna for sitting. They also get a course of power washing to hose them down.

Now that the chimney is clean, the floors are swept and disinfected and so are the benches and chairs, it’s time to put everything back into its place. It is also time to fire up the stove to see how much better it works, to burn off that WD-40 which should have been drying for a few hours while we cleaned the rest of the sauna. It’s also a good time to enjoy the sauna. It’s been a long day with lots of physical labor which calls for an evening sauna to relax and have a few beers.

Cheers!

Dec 7, 2015

Fire in the hole!

Last weekend, we rented a cabin in Minong, WI for a weekend of relaxation and fun for the kids. The cabin was one of the few cabins available to rent which had a sauna.  On a different note, I find it odd that here in the Northland, there’s only about 4 cabins that are available for rent that have saunas. So if you know of one—please PM me with details. Back to the story. The weather played out perfectly. It was in the mid 40s during the day. The lake had no ice on it. There was a straight shot run from the sauna to the lake and a big fire pit right by the lake. We strategized how we’re gonna get the sauna nice and hot and jump in the lake! The sauna house was what I think an 8x12 building. It was made out of cedar and had a metal roof. The roof was gable and so was the ceiling (now that I’ve built a sauna myself—I wondered why they’re heating all that extra space. ) The walls and roof were un-insulated, possibly only having the reflective foil, though I’m not sure. The hot room had 2 windows. Neither one was made to open, but I’m sure they didn’t help to keep the heat in. The stove was a small old stove with the front door laying on the floor. We barely attached it back to the stove, got out the broom and cleaned out all the pieces of wood all over the floor from the logs that were brought in by previous users. I told my friend that with all the mistakes in building this sauna—it’d take 3 hrs to get it up to temp. I think he took what I said a little too seriously and stuffed the stove full of wood. We went on to start grilling dinner and getting ready to eat. About 30 minutes later, my friend looks at me and says—"are there supposed to be flames coming out of the chimney?" I look up from the deck, and there are in fact, good size flames coming though the chimney cap. Now the cabin and sauna are all located on a lot heavily covered in pines. There are pine needles everywhere. All though the sauna roof was metal, there was a bunch of pine needles laying right on the chimney flashing. My first thought was OH SHEET! I grabbed an empty water jug, ran in the house, filled it up with water and came back to douse down the stove. The flames subsided. We decided to pass on a sauna that day J

Thinking about it further on Monday, I would guess that it was the chimney fire people warn you about. Just the creosote in the pipe that caught fire. I confirmed my theory with Glenn from SaunaTimes.com who was in full support.  J I have always planned on having a fire extinguisher in my new sauna, but I think now—I will go for a bigger one.