Well, finally,
after a long process of building we were up to the big milestone step of
putting up the cedar. I guess the decision to start with walls or ceiling is up
to you, but I started with walls in the hot room. This work is pretty simple,
better done with 2 people, and shows significant results. You do need to decide
on which side of the cedar you want to use—rough or polished, and stick to it
as much as possible. After that, just remember to leave an 1/8” gap on both
sides of each cedar for expansion. Due to the wall framing, I put
the cedar horizontally so that it can be attached with brad nails to the studs.
Also, keep in mind, you probably bought the cedar T&G at the best price you
could find, so the boards won’t all be perfect. Remember to presort the boards
before cutting. Uglier go on the bottom and behind benches, nicest ones go to
right above the benches where people’s skin will touch. You’ll probably find
that some board are ugly on the side you’ve chosen to put up, but nice on the
other side. Don’t worry too much and use whichever side is nicest. Unless you
know which board you used the other side on, you won’t really notice it later. Also,
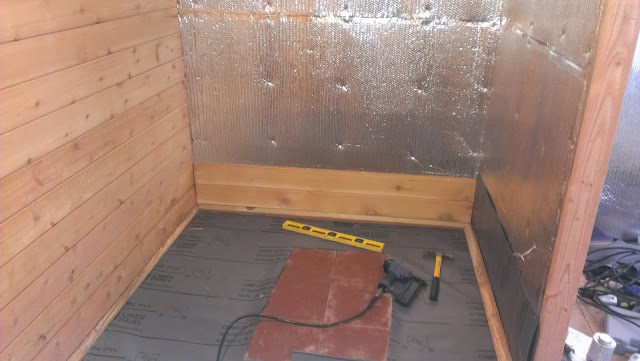
if you haven’t done so already, now is a good time to cut open any outlets or
speaker wires you may have previously covered up with the bubble foil. This is
your last chance before you accidently hide something.
To begin, I
started on the long wall of the hot room which was a little under 12 feet. I
cut the cedar board to size, set it over the drip edge with the groove side
down and put a long level on top of it. This is important as any small level
imperfection here will really show up 7 feet at the top. Once the first board
was level, I nailed it with the brad nails through the bottom of the tongue at
all the studs. When the next piece goes over the tongue, the brads get hidden.
 |
| Leveling the starting cedar tongue and grove board. |
 |
| Nail brads through the bottom of the tongue in to the wall studs. |
 |
| The brads get covered by the grove of the next cedar board. |
Once the first board is
leveled and attached, the rest just go on top one by one, groove over tongue.
One thing to remember here is to make sure the tongue is all the way in the
groove before nailing each subsequent board. Again, some boards you’ll find are
bowed—simply persuade them by pushing on them before putting a brad in. Do use
a level with each board to make sure you’re still level. Usually, if it shows
off level, means your tongue is not all the way in the groove, adjust and move
on.
Go up the wall until there’s
one more board left to put up, Leave it off for now. You’ll cut it to size and
put it up once the ceiling is complete. At this time, move on to the opposite
wall. The reason to do the opposite wall as opposed to the contiguous wall is
so that the wood join pattern looks uniform. The side walls will both have
cedar going over the cedar on the 2 opposite walls.
If everything is level, you’ll
be surprised to see that the cedar boards line up in the corners—meaning each
wall has the same row of cedar continuing—that looks nice! One issue you may
run in to is going over the top of the door, or the top/bottom of the window.
If you can have one continuous piece that just has the door/window cut in to it—it
looks best. If not, don’t worry, you can stop your cedar at the start and end
of the door, and put one separate piece above it.
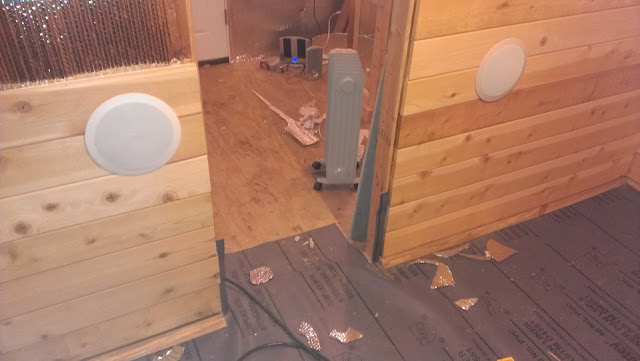
A few months back, I bought
ceiling speakers on CraigsList—5 for $50. I planned to use 2 in the hot room. I
ran the wiring before I put up bubble foil and simply needed to cut the cedar
around each of the 2 speakers and put them in. Cutting around speakers and can
lights adds a little complexity, but with the right tool, it’s a non-issue.
Originally, I made my cuts with the Multi-purpose tool I bought when cutting an
opening for the chimney. However, later, a friend bought a jigsaw that made it
even easier!
 |
| Hot room speakers installed in to cedar. |
From here on, it’s just a
matter of time before the walls are done up to the last board where they meet
the ceiling. Before those go on, we start with the ceiling. The ceiling is done
the same way, minus the level checks (I didn’t do them). One thing you need to
make sure before you begin is that there are nailing surfaces everywhere to
hold your cedar in place. I found out I missed some above the stove where the
Durock was hung. At this stage, I ended up taking some of the bubble foil down
and added my nailing studs, then stapled the bubble foil back.
To start the cedar on the
ceiling, standing on a ladder, simply push the first board all the way to the
wall with the groove side and nail it with brads through the bottom of the tongue
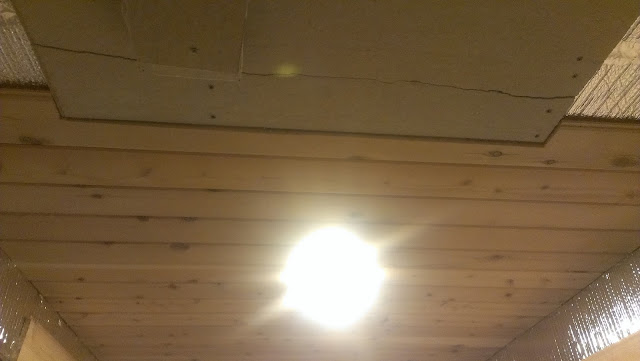
to all studs. Go on putting the rest of the boards and cutting around lights
and the Durock above the stove. Again, make sure each tongue is all the way in
the grove the whole length of each board and nail.
Once the ceiling is complete,
using a table saw if needed, cut the wall cedar to the right width. Also,
because it’s the last piece at the wall & ceiling intersection, there’s not
much room for it to turn. The trick here is cut the one side of the groove off
on the back of the board. You can then push the board over the tongue rather
than putting the tongue inside the groove. Nail on all studs with brads.
 |
| Cedar on the ceiling. |
Now, with all the cedar up on
the walls and ceiling, you can be proud of the progress you made. The sauna is
getting close!
 |
| Wall cedar going up side wall. |
 |
| More cedar tongue and groove. |
 |
| Corner of two cedar tongue & groove walls. |
 |
| Getting close to finishing the Tongue & Groove on the walls. |
 |
| Last tongue & groove cedar connecting wall to ceiling. |
 |
| Tongue & Groove cedar around the chimney Durock. |


No comments:
Post a Comment
Would love to hear your comments, ideas, questions, and suggestions!